
How to make a custom aluminum extrusion?

Are you facing production delays or high costs because standard aluminum profiles don’t match your needs? I’ll walk you through how custom aluminum extrusion solves this.
You can make custom aluminum extrusions by working through design, die manufacture, extrusion, finishing and validation steps — each one must be done correctly so the profile meets your requirements.
Let’s go deeper into the key topics you must understand when designing and producing a custom aluminum extrusion.
What steps create custom extrusion profiles?
If you skip or short‑cut a step you’ll risk defects, extra cost or delays.
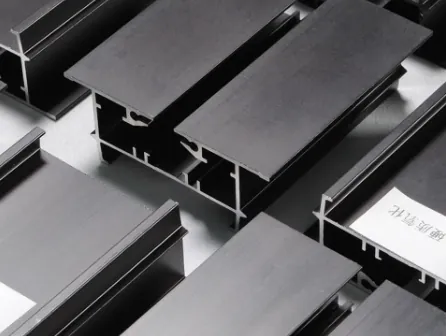
The process of custom aluminum extrusion involves alloy selection, die preparation, billet heating, extrusion through the die, cooling/stretching, cutting and finishing.
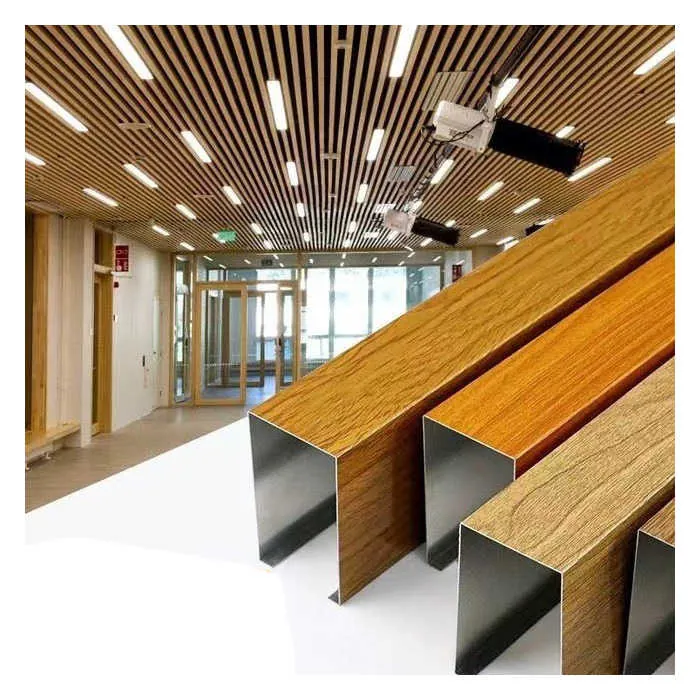
To make a custom aluminum extrusion, you follow a sequence of steps. First you select the alloy and specify the cross‑section you need. Material choice matters because it sets strength, corrosion resistance and how well the alloy extrudes.
Next you design the die tool. The die has the exact shape of the cross‑section you want. The die must be manufactured with precision and pre‐heated so the metal will flow properly.
Then you take the billet (a cylinder of the chosen alloy) and heat it to the correct temperature (for example around 400‑500 °C) so that it becomes plastic but not molten.
The extrusion machine (a strong ram) forces the heated billet through the die under high pressure. As the aluminum exits the die it begins cooling, and the shape becomes your profile.
After extrusion you cool and quench the profile (often water or air), stretch it to straighten and relieve stresses, then cut to length.
Finally you apply any finishing steps: heat‑treating or ageing (to get T5, T6 tempers), surface finishing like anodizing or powder‑coating, and you check dimensions, straighten if needed.
These steps form the backbone of making a custom extrusion. If you rush one step (say die design) you’ll get distortions, warping or dimension drift. That’s why for a manufacturer like yours (B2B, custom aluminium profiles) each step must be well managed.
Here’s a summary table of the main steps:
| Step | Purpose |
|---|---|
| Alloy selection & design | Sets material performance and manufacturability |
| Die design & manufacture | Determines shape accuracy and flow behaviour |
| Billet heating & loading | Prepares material for extrusion |
| Extrusion through die | Forms the desired cross‑section |
| Cooling, stretching & cutting | Stabilises the profile and prepares lengths |
| Finishing & inspection | Meets surface quality, mechanical properties and tolerances |
The sequence of steps in custom aluminium extrusion always starts with die manufacture before alloy selection.False
Alloy selection and design typically come before die manufacture so that the die can be made to suit the chosen alloy and profile.
Skipping proper billet heating can lead to defects in the extruded profile.True
If the billet is not heated to the proper temperature the metal may not flow correctly through the die, causing defects such as cracks or incomplete fill.
Why die design is critical for accuracy?
A poor die will wreck your production, cause scrap and cost overruns — this is a major risk.
Die design controls metal flow, shape stability and wall‐thickness consistency; a well‐designed die leads to accurate, repeatable extrusions.

When designing a custom profile, the die is arguably the most critical tool in the whole process. Here is why.
How die design affects accuracy
- Metal flow: The die must channel aluminum so that it fills every part of the profile equally. If flow is uneven you’ll get thin walls, weak sections or warping.
- Internal stresses: Poor die design might produce residual stresses and distortion in the finished profile once it cools.
- Wall thickness uniformity: Thin, inconsistent walls are hard to extrude and cool irregularly, causing deformations. Good die design aims for uniform walls and symmetrical shapes.
- Corner radii: Sharp corners are harder to fill and may cause die wear or cracking. The guide recommends adding radii to corners to improve flow and reduce defects.
Why this matters for you
Since your company deals with custom aluminium profiles (10mm‑400mm range) and does CNC, bending, welding etc., the primary profile must be dimensionally stable. If the profile is out of tolerance or twists after extrusion, downstream operations (CNC, bending) will be harder and cost more. A well‐designed die reduces that risk.
What you should ask or check
- Confirm that the die maker has experience with similar profile complexity and alloy (6063 or 6061)
- Request flow simulation or at least validation of the die design
- Specify the critical dimensions and tolerances up front so the die design can incorporate them
- Ask about die maintenance, die life, and how many cavities the die has
- Review prototypes or trial runs to pick up deviations early
Die design only affects tooling cost and does not impact the profile’s dimensional accuracy.False
Die design directly impacts how the metal flows and therefore influences the dimensional accuracy and structural qualities of the profile.
Ensuring uniform wall thickness in your profile helps improve accuracy and reduce warping.True
Uniform wall thickness leads to even cooling and less residual distortion, so better accuracy and lower risk of warping.
How to validate profile dimensions?
Even with a good design and die you must check the actual parts to make sure they meet specs — skipping this causes lots of rework.
Dimension validation uses inspection tools (calipers, CMM) and process controls (monitoring cooling, stretching, straightening) to ensure the custom profile meets required tolerances.

Once you have a profile extruded, you need to validate that its dimensions and geometric characteristics meet your specification. This is critical because even small deviations can interfere with assembly, machining or structural performance.
Inspection methods
- Use calibrated tools: callipers, micrometers, height gauges for simple dimensions
- For more complex profiles, a Coordinate Measuring Machine (CMM) or laser scanning may be used
- Check straightness and twist: Because profiles can warp or twist after cooling, straightness and twist measures are important
- Sample testing: Pull samples from the production run at defined intervals to monitor consistency
Process controls
- Monitor cooling method: Uneven or slow cooling may cause distortions and therefore dimensional drift
- Stretching / straightening step: The profiles may be stretched a set % (often ~2‑4 %) to relieve internal stresses and provide straightness
- Length cutting and tolerance: Ensure the cut lengths are within allowed tolerances and the ends are square and clean
- Surface finish and its effect: Some finishes (anodizing, powder‐coat) add thickness and may affect tolerances
What you should do as the buyer/manufacturer
- Define your tolerance table
- Insist on a First‑Piece Inspection Report (FPIR)
- Agree with the extruder on how often dimensional checks will be done
- Use straightness/twist controls in your incoming QA
- Keep documentation for traceability
Surface finishes on extrusions do not impact the dimensional tolerances of the profile.False
Finishes such as anodizing or plating add to dimension and must be considered when specifying tolerances and machining allowances.
Stretching of extruded profiles is used to straighten them and relieve internal stresses.True
After extrusion, parts may undergo stretching to align and remove distortions caused by cooling and internal stresses.
Can prototype runs reduce risks?
Running a small trial before full production helps catch errors early, saving cost and time later.
A prototype run for custom extrusion lets you test the die, validate dimensions, detect flow issues and make adjustments before full‐scale production.
When you are creating a new custom profile, doing a prototype or trial run is a prudent way to reduce risks. Here are the benefits and things to watch:
Benefits of prototype runs
- Validate die performance
- Check dimensional accuracy
- Identify downstream issues
- Optimize finishing
- Minimise scrap cost
Things to consider
- Define what counts as successful
- Monitor variables
- Be ready to iterate
- Factor in cost/time
- Agree logistics
Why this meshes with your business model
Since your company is B2B, supplies custom aluminium extrusions, with CNC processing, you have an imperative to control quality for large scale customers. A prototype run means you can align with the extruder early, reduce surprises, meet your customers’ strict specs and build a more efficient production pipeline.
Prototype runs for extrusion are unnecessary if you trust the manufacturer’s experience.False
Even with an experienced manufacturer, new profile shapes and die designs may behave differently; prototype runs help catch unexpected issues.
A prototype extrusion run allows validation of die and process before committing to full production.True
Trial runs enable checking flow, dimensions, finishing and process parameters before large‐volume production.
Conclusion
Custom aluminum extrusion works well only if you follow each step carefully, ensure the die is well designed, validate the dimensions rigorously and use prototype runs to reduce risk.


