
How to accurately cut aluminum extrusion?
Cutting aluminum extrusion sounds simple, but one wrong slice can ruin the entire piece. For manufacturers, precision is everything.
To accurately cut aluminum extrusion, you need the right tools, proper clamping, clean cutting techniques, and reliable guides to ensure alignment and prevent damage.
If your aluminum cuts are crooked, uneven, or rough, you’re in the right place. Here’s how to get perfect results every time.
What tools ensure precise cuts?
A common mistake in aluminum cutting is using wood or steel tools. This results in frayed edges or burnt surfaces. Precision begins with tool selection.
Miter saws with non-ferrous blades, cold saws, and CNC saws are the most reliable tools for cutting aluminum extrusion cleanly and accurately.

Aluminum is soft compared to steel, but it reacts badly to the wrong blade. It can gum up, chatter, or deform. That’s why tool type matters so much.
Types of Saws You Can Use
Miter Saw (with carbide-tipped blade)
- Best for 45° or 90° cuts
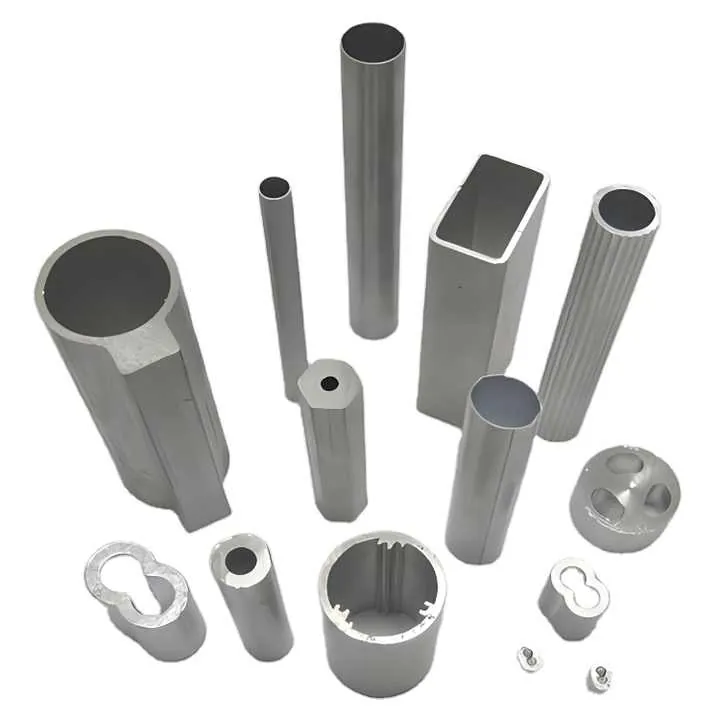
- Good for standard aluminum profiles
- Needs blade with high tooth count
Cold Saw
- Cleanest, smoothest cut
- Uses slower RPM for no heat distortion
- Great for thicker extrusions
CNC Precision Saw
- Ideal for mass production
- Programmable angles and feeds
- Excellent for tight tolerances
| Tool Type | Best Use | Pros | Cons |
|---|---|---|---|
| Miter Saw | On-site cuts, general use | Easy setup, fast | Needs high-quality blade |
| Cold Saw | Precision workshop cuts | No burrs, quiet | Expensive, slower |
| CNC Saw | High-volume, custom jobs | Highly accurate | High initial investment |
Tool setup also affects outcome. Make sure the blade is square, clean, and mounted tightly. Use the correct feed rate—too fast will tear, too slow will heat and stick.
Using a cold saw provides smoother and cleaner cuts compared to a standard miter saw.True
Cold saws use slower speeds and solid blades, resulting in minimal heat and burr-free edges.
Wood-cutting blades are ideal for aluminum extrusion because they cut quickly.False
Wood blades can burn, chip, or deform aluminum, especially without proper teeth geometry.
Why clamping improves cut accuracy?

I’ve seen clients try to hand-hold extrusions while cutting. The result? Inconsistent angles, shifting mid-cut, or even broken blades. That’s where clamping saves the day.
Clamping aluminum extrusion holds the material steady, preventing vibration, slippage, or angle shifts, which leads to cleaner and more accurate cuts.
Aluminum is lightweight and slippery. When a spinning blade hits it, even a slight movement can cause a cut to drift. Clamps lock the material in place.
Types of Clamps to Use
Quick-Grip Clamps
- Easy to adjust
- Good for temporary setups
Toggle Clamps
- Best for repetitive cuts
- Provides consistent pressure
Pneumatic Clamps
- Used in CNC or production lines
- Fast and uniform holding force
| Clamp Type | Use Case | Strength |
|---|---|---|
| Quick-Grip | DIY or small-batch | Medium |
| Toggle | Fixed jigs, production | High |
| Pneumatic | Automated systems | Very high |
Best Practices for Clamping
- Use two clamps: One on each side of the blade to prevent twisting.
- Clamp near the cut: Reduces flex and increases precision.
- Use non-marring pads: Protects anodized or coated surfaces.
Incorrect clamping can actually worsen accuracy. If only one end is held, thermal expansion or pressure from the blade can shift the extrusion. Even small shifts can lead to several millimeters of misalignment in long profiles.
Proper clamping prevents movement during cutting and leads to more accurate results.True
Clamps hold the profile steady, reducing vibration and angle errors.
You should only clamp one side of the aluminum extrusion for better blade clearance.False
Clamping only one side can cause the profile to twist or move during the cut.
How to avoid burrs during cutting?

Burrs are sharp metal leftovers that form when the cut isn’t clean. They look bad, feel worse, and require extra finishing work. But they’re avoidable.
To avoid burrs, use sharp carbide-tipped blades, proper feed rates, lubrication, and post-cut deburring tools when necessary.
Why Burrs Form
- Blade wear: Dull blades tear, not slice.
- Wrong speed: High RPM without control can melt or fray aluminum.
- No lubrication: Dry cuts build heat, causing aluminum to smear.
Prevention Techniques
Blade Selection
- Use blades with triple-chip grind
- High tooth count (80+ teeth for fine cuts)
Lubrication
- Use mist coolant or wax sticks
- Prevents aluminum from sticking to blade
Proper Feed Rate
- Too fast: rough edges
- Too slow: heat build-up
Post-Cut Deburring
- Use rotary deburring tools, hand files, or sanding sponges
- For high-volume: tumblers or belt sanders
| Cause of Burr | Solution |
|---|---|
| Dull Blade | Replace or sharpen blade |
| Fast Feed Rate | Lower speed, increase control |
| No Lubricant | Use mist spray or cutting wax |
| Wrong Blade Type | Use blade made for non-ferrous metals |
By planning for burr control, you can reduce finishing time and improve safety for handling.
Using lubricant during the cutting process helps reduce burrs on aluminum extrusion.True
Lubricants reduce friction and prevent aluminum from gumming up the blade.
Burrs only occur if you cut aluminum at very high speeds.False
Burrs can also form from dull blades, wrong feed rates, or poor material support.
Can guides enhance alignment?
Trying to cut a long aluminum extrusion by eye is like drawing a straight line without a ruler. It may seem okay—but it won’t be precise.
Using guides, fences, or jigs ensures consistent alignment, accurate angles, and repeatable cuts, especially for long or complex profiles.
Guides are especially helpful when you need multiple identical cuts. Even a slight 1° angle off can ruin a joint or mess up assembly.
Tools to Improve Alignment
Fixed Fence
- Built into most saw tables
- Keeps extrusion straight during cut
Angle Jigs
- Helps cut at specific angles
- Ideal for frames or 45° miter cuts
Stop Blocks
- Used in batch production
- Ensures consistent length
| Guide Type | Use Case | Benefit |
|---|---|---|
| Fence | General straight cuts | Keeps profile aligned |
| Angle Jig | Framing, diagonal cuts | Repeatable accuracy |
| Stop Block | Batch production | Consistent lengths |
Setup Tips
- Align the guide parallel to the blade.
- Test with scrap before real cuts.
- Make sure guides are stable and don’t shift mid-cut.
A well-set guide reduces mistakes, speeds up workflow, and improves joint fit-up in final assemblies. For custom aluminum frames or industrial components, this is key.
Stop blocks are used to help make multiple cuts of the same length.True
They act as a physical stop to ensure consistent part sizes.
Cutting aluminum extrusions freehand provides better flexibility and control.False
Freehand cuts increase the risk of misalignment and inconsistent results.
Conclusion
To accurately cut aluminum extrusion, you need more than just a blade. You need the right tools, a firm clamp, strategies to control burrs, and precise guides. When all these elements come together, the result is a clean, straight, and ready-to-use profile. That’s how professionals do it.


