
Как соединить алюминиевые профили?
You face a challenge when your aluminum frames don’t align or hold firm. The connection seems weak, misaligned, or ugly. You can fix that with smart joining methods and hardware.
This guide shows how to join aluminum extrusions properly by covering hardware, internal fasteners, alignment techniques, and brackets for rigidity.
We go step by step into the key questions you need to ask. Then you’ll know what works and why it matters.
What hardware connects extrusion frames?
You might wonder why your frame loosens or wobbles. The wrong hardware may be to blame. It’s time to pick the right connectors.
The main hardware types for extrusion frames include T‑nuts, corner brackets, joining plates, anchoring bolts and gussets.

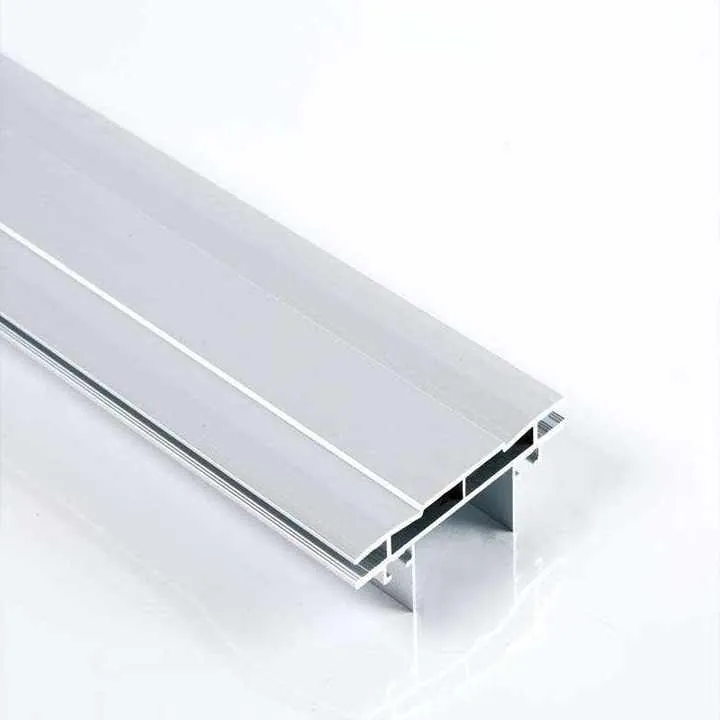
When working with aluminum extrusion systems like ours, choosing the correct hardware matters a lot. First, identify the profile’s slot size and shape. That helps to pick T‑nuts or sliding nuts that match. A T‑nut slides into the slot and allows you to bolt other components. A corner bracket uses screws and nuts to hold a 90‑degree angle. A joining plate spans two profiles side by side and creates a flat joint. Each type offers different strength, cost, and speed of assembly.
Types of connector hardware
- T‑nuts / sliding nuts: slide into the slot; good for flexible layouts.
- Угловые кронштейны: fixed right‑angle joints; fast to install.
- Соединительные пластины: create flush connections; useful for aesthetic or low‑profile joints.
- Anchoring bolts: secure profiles to ground or base; important for stable frames.
- Обоймы: add reinforcement at corners or weak points.
How to select hardware
You want to consider: slot type, load direction, accessibility, and finish. Use hardware rated for your profile’s T‑slot size (for example 8 mm slot). If the frame will carry vertical loads, choose hardware with angled or gusseted support. If you need to assemble and disassemble often, pick sliding nuts and adjustable brackets.
Installation tips
Make sure the slot is clean before inserting T‑nuts. Tighten bolts gradually and check squareness at each step. Using a torque wrench can avoid over‑tightening and aluminum deformation. For re‑usable systems, neat labeling of connectors helps future maintenance. For example, label each hardware type and its place in the frame.
T‑nuts are inserted into the slot before attaching the profileПравда
T‑nuts slide into the profile slot and provide a nut for bolts to engage when connecting hardware.
Joining plates allow unlimited movement between joined profilesЛожь
Joining plates are rigid connections; they limit movement rather than allow unlimited movement.
Why internal fasteners enhance appearance?
An exposed bolt or bracket might ruin the sleek look of your frame. Hidden hardware gives you a clean finish. You value that look.
Internal fasteners go inside the slot or profile so the exterior stays smooth and visually clean.

In many projects, the visual appeal of extruded aluminum frames is as important as strength and precision. Internal fasteners help you get both. They hide the bolt heads and nuts within the slot or profile cavity so the outside faces are flat or unobstructed. This approach has key benefits: better aesthetics, fewer exposed edges, and easier cleaning or finishing.
Benefits of hidden hardware
- Чистый внешний вид: No visible bolts or nuts; the design looks seamless.
- Reduced snagging: Fewer protruding parts means less chance of catching wires or hands.
- Improved finish: Surfaces can be anodized, powder‑coated or wood‑grain wrapped without cutouts.
- Better protection: Internal hardware is less exposed to damage or corrosion.
Common types of internal fasteners
- Threaded inserts: placed into the profile end and allow a bolt from outside to thread in.
- Hammer‑in nuts: inserted through a slot and turned inside the profile so the nut sits inside.
- Clamp‑in connectors: two profiles share a cavity and a bolt clamps them together behind the face.
Design tips for clean look
Plan the fastener layout early. Decide which faces will stay flush and which can have access for assembly. Use matching finish hardware for covert look. If you apply surface treatments like anodizing or powder coating, insert fasteners after finishing if possible. Make sure internal cavities are clean and free of debris before fastening. Use thread‑lock or vibration‑resistant hardware if motion or vibration is expected.
Hidden fasteners reduce visible hardware and improve aestheticsПравда
Internal fasteners place the hardware inside slots so external faces appear smooth and clean.
External brackets always look better than hidden fastenersЛожь
External brackets are visible and may detract from a clean design compared to hidden fasteners.
How to ensure strong joint alignment?
Your joints may look fine but lack precision. Misalignment ruins performance and life. You need techniques that guarantee alignment.
Strong joint alignment comes from precise cutting, proper fixturing, pre‑assembly checking and tightening in stages.

Alignment is the backbone of a robust extrusion frame. When two profiles meet, any misalignment shifts load onto unintended surfaces. That may cause stress, wear or failure. I have seen frames fail because one corner was 1 mm out, and over time the loads amplified the issue. In response, I always use a set workflow to ensure alignment from the start.
Pre‑cut and pre‑check
I begin by verifying all profile lengths. I measure each cut with a digital caliper or tape and check square ends with a machinist’s square. I check slot width, face flatness and surface finish. I mark each piece with an identifier. I layout the pieces on a flat surface and dry‑assemble the frame–without fasteners–to test fit and alignment.
Fixturing and assembly
Next, I use a flat table and reference bars to hold profiles in position. I use corner squares or angle plates to hold 90‑degree corners. I clamp the profiles in place to avoid movement. I insert fasteners loosely and then gradually tighten. I follow a pattern: tighten opposite sides in sequence to avoid skewing. I often insert a spirit level or laser to check the top surface is level and the face planes align.
Final checking and maintenance
Once the frame is fully fastened, I check again: corners at 90°, faces flush, no gaps, joints tight. I inspect each fastener for torque. I record the torque values and check again after a few hours of use or after test loading. I also mark fasteners with paint or stickers to monitor for loosening over time.
Alignment checklist
| Шаг | Назначение | Инструмент |
|---|---|---|
| Measure cuts | Ensure correct length | Tape / caliper |
| Check ends | Ensure square face ends | Machinist’s square |
| Fixture profile | Prevent movement during assembly | Clamps, angle plates |
| Gradual tightening | Avoid skewing or stress | Динамометрический ключ |
| Окончательная проверка | Confirm alignment and integrity | Level, gap gauge |
Tightening gradually in stages helps avoid skewing of the frameПравда
Gradual tightening allows parts to settle evenly and prevents distortion from uneven bolt loads.
Once the frame is assembled you no longer need to check for loosened fastenersЛожь
Fasteners may loosen over time due to vibration or load; periodic checks are needed.
Can brackets increase structural rigidity?
You have a light frame but it still flexes under load. You worry it won’t hold up in real use. Brackets might give you the answer.
Brackets, especially gussets and diagonal reinforcements, can boost rigidity and prevent frame flex or torsion.

When building frames with aluminum extrusions, sometimes the default square connections are not enough. Under heavy loads, lateral forces or twisting, the frame may bend or wiggle. In industrial applications such as conveyors, gantries or machinery supports, the rigidity of the frame matters for accuracy, durability and safety. For example, our own company used a standard 90‑degree bracket in a large frame. Under load the frame twisted slightly because the bracket did not resist torsion. We switched to a thicker gusset bracket with diagonal support and the frame became firm.
Why brackets matter
Brackets increase structural rigidity by distributing loads across wider surfaces and resisting movement in multiple axes. A simple right‑angle bracket resists one direction of force. A gusset bracket adds resistance to twisting. A diagonal bracing bracket resists shear and torsion. Without proper brackets the frame joints become weak spots, particularly when tall, wide or loaded.
Types of structural brackets and use cases
| Тип кронштейна | Преимущество в силе | Пример использования |
|---|---|---|
| Basic right‑angle bracket | Resists vertical load at 90° corner | Light duty frames |
| Gusset bracket (triangular) | Resists torsion, adds depth | Medium to heavy duty frames |
| Diagonal bracing bracket | Resists shear and twisting | Tall or wide frames under dynamic load |
| Double‑plate bracket | Two parallel plates for high bearing load | Heavy machinery base frames |
Design and installation tips
Select bracket material and thickness that match the profile size and expected load. Use hardware and fasteners rated for the same load as the bracket. Align the bracket surface flush with the profile face to avoid eccentric loads. Pre‑drill or use slots for adjustability. For large frames consider using combination of brackets plus internal fasteners. Add diagonal bracing between opposing corners for extra stability. After assembly test the frame under load and inspect bracket joints for deformation, gap formation or movement.
A diagonal bracing bracket helps resist shear and torsion in a frameПравда
Diagonal bracing adds resistance to shear forces and twisting, improving overall frame rigidity.
Using only right‑angle brackets always gives the best rigidity for all framesЛожь
Right‑angle brackets may not resist torsion or shear; diagonal or gusseted brackets may be needed for full rigidity.
Заключение
In this guide I showed how to join aluminum extrusions with the right hardware, hidden fasteners, alignment practices and structural brackets. When you apply these methods the frames you build will be strong, precise and professional.

