
カスタムアルミ押出材の製造方法

標準的なアルミ形材がニーズに合わないために、生産の遅れやコスト高に直面していませんか?カスタムアルミ押出材がどのように解決するのか、ご説明します。.
設計、金型製造、押出、仕上げ、検証の各段階を経て、カスタムアルミニウム押出材を作ることができます。.
カスタムアルミニウム押出材を設計・製造する際に理解しなければならない重要なトピックについて、さらに深く掘り下げてみましょう。.
どのような手順でカスタム押出プロファイルを作成するのですか?
ステップをスキップしたり、ショートカットしたりすれば、欠陥や余分なコスト、遅延のリスクが生じる。.
カスタムアルミニウム押出の工程には、合金の選択、ダイスの準備、ビレットの加熱、ダイスを通しての押出、冷却/延伸、切断、仕上げが含まれます。.
カスタムアルミニウム押出材を作るには、一連のステップに従います。まず、合金を選択し、必要な断面を指定します。材料の選択は、強度、耐食性、合金の押し出しの良し悪しを決めるので重要です。.
次に金型を設計する。金型は、あなたが望む断面の正確な形状を持っています。金型は精密に製造され、金属が適切に流れるように予熱されなければならない。.
その後、ビレット(選択した合金の円柱)を適切な温度(例えば約400~500℃)まで加熱し、可塑性を持たせるが溶融はさせない。.
押出機(強力なラム)は、加熱されたビレットを高圧でダイスに押し通します。アルミニウムがダイスを出ると冷却が始まり、形状がプロファイルになります。.
押し出し後、冷却して急冷し(多くの場合、水または空気)、引き延ばしてまっすぐにし、応力を緩和した後、長さに合わせて切断する。.
最後に、熱処理や時効処理(T5、T6テンパーを得るため)、陽極酸化や粉体塗装などの表面仕上げを施し、寸法をチェックし、必要なら矯正する。.
これらのステップは、カスタム押出成形品を作るためのバックボーンになります。あるステップ(例えば金型設計)を急げば、歪み、反り、寸法のズレが生じます。そのため、御社のようなメーカー(B2B、カスタムアルミプロファイル)では、各工程をしっかりと管理する必要があります。.
主な手順を表にまとめてみた:
| ステップ | 目的 |
|---|---|
| 合金の選択と設計 | 材料の性能と製造性を設定 |
| 金型設計・製造 | 形状精度と流動挙動を決定 |
| ビレットの加熱と装填 | 押出成形のための材料準備 |
| ダイスによる押し出し | 目的の断面を形成する |
| 冷却、ストレッチ、カッティング | プロファイルを安定させ、長さを整える。 |
| 仕上げと検査 | 表面品質、機械的特性、公差に適合 |
カスタムアルミ押出の一連の工程は、合金選択の前に、常にダイス製造から始まります。.偽
合金の選択と設計は通常、金型製造の前に行われるため、選択した合金とプロファイルに合わせて金型を製造することができます。.
適切なビレット加熱を省略すると、押し出されたプロファイルに欠陥が生じる可能性があります。.真
ビレットが適切な温度に加熱されないと、金属がダイの中を正しく流れず、亀裂や不完全な充填などの欠陥が発生する可能性がある。.
なぜ金型設計が精度にとって重要なのか?
金型の不良は生産に支障をきたし、スクラップやコスト超過の原因となる。.
金型設計は、メタルフロー、形状の安定性、肉厚の均一性を制御します。優れた設計の金型は、正確で再現性の高い押出成形につながります。.

カスタム・プロファイルを設計する場合、金型は間違いなく全工程で最も重要なツールです。その理由は以下の通りです。.
金型設計が精度に与える影響
- メタルフロー:ダイスは、プロファイルのすべての部分を均等に満たすようにアルミニウムを流す必要があります。流れが不均一だと、薄い壁や弱い部分、反りが生じます。.
- 内部応力:金型設計が悪いと、完成したプロファイルに残留応力が発生し、冷却後に歪みが生じる可能性がある。.
- 肉厚の均一性:肉厚が薄く、均一でないダイスは、押し出しが難しく、不規則に冷却されるため、変形の原因となります。優れたダイス設計は、均一な肉厚と対称的な形状を目指します。.
- コーナーR:鋭利なコーナーは充填が難しく、金型の摩耗やひび割れの原因となる。このガイドでは、流動性を改善し欠陥を減らすために、コーナーにRをつけることを推奨している。.
なぜこれが重要なのか
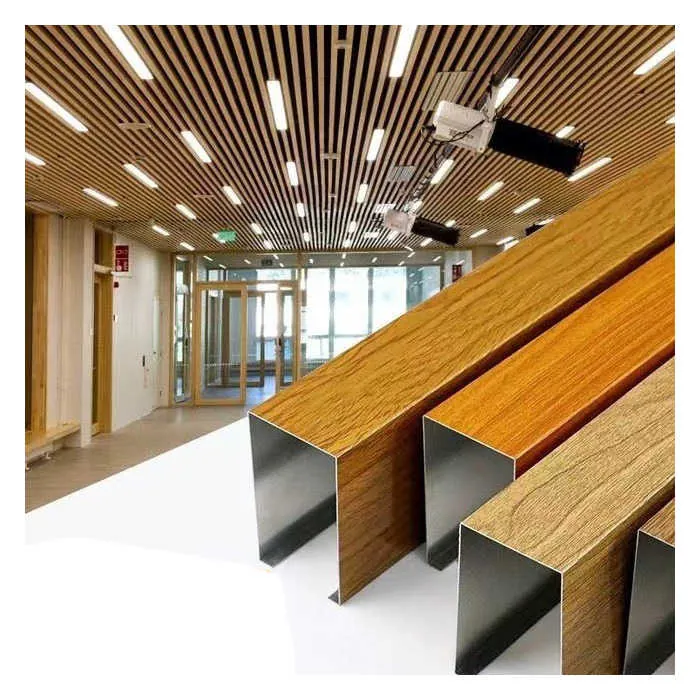
御社はカスタムアルミ形材(10mm~400mmの範囲)を扱い、CNC、曲げ、溶接などを行うため、主要な形材は寸法的に安定していなければなりません。押出後にプロファイルが公差から外れたり、ねじれたりすると、下流の作業(CNC、曲げ加工)が難しくなり、コストも高くなります。よく設計されたダイスは、そのようなリスクを軽減します。.
確認すべきこと
- 金型メーカーが同様の複雑な形状や合金(6063または6061)の経験があることを確認する。
- フロー・シミュレーション、または少なくともダイ設計の検証を依頼する。
- 重要な寸法と公差を前もって指定し、金型設計に反映させる。
- ダイのメンテナンス、ダイの寿命、ダイのキャビティ数について聞く
- 試作品や試運転をレビューし、逸脱を早期に発見する。
金型設計は金型コストに影響するだけで、プロファイルの寸法精度には影響しません。.偽
金型設計は、金属の流れに直接影響するため、プロファイルの寸法精度と構造的品質に影響を与えます。.
プロファイルの肉厚を均一にすることで、精度を向上させ、反りを抑えることができます。.真
均一な肉厚は均一な冷却と残留歪みの低減につながるため、精度が向上し、反りのリスクも低くなります。.
プロファイル寸法の検証方法
優れた設計と金型があっても、実際の部品が仕様を満たしているかどうかをチェックしなければならない。.
寸法検証では、検査ツール(ノギス、CMM)と工程管理(冷却、延伸、矯正の監視)を使用して、カスタムプロファイルが必要な公差を満たしていることを確認します。.

プロファイルを押し出したら、その寸法と幾何学的特性が仕様を満たしているかどうかを検証する必要があります。わずかな偏差でも、組立、機械加工、構造性能に支障をきたす可能性があるため、これは非常に重要です。.
検査方法
- キャリパー、マイクロメーター、高さゲージなど、校正された工具を使用する。
- より複雑なプロファイルには、座標測定機(CMM)またはレーザースキャンを使用することができます。
- 真直度とねじれのチェック:プロファイルは冷却後に反ったりねじれたりすることがあるため、真直度とねじれの測定は重要である。
- サンプルテスト:一貫性を監視するために、決められた間隔で生産工程からサンプルを採取する。
プロセス制御
- 冷却方法を監視する:不均一な冷却や遅い冷却は、歪みと寸法ドリフトの原因となります。
- 延伸/矯正ステップ:内部応力を緩和し、真直度を出すために、プロファイルを%(多くの場合、~2~4 %)伸ばします。
- 長さの切断と公差:切断された長さが許容公差内にあり、端が正方形できれいであることを確認する。
- 表面仕上げとその影響:一部の仕上げ(陽極酸化処理、粉体塗装)は厚みを増し、公差に影響する場合がある。
バイヤー/メーカーとしてすべきこと
- 公差表を定義する
- ファーストピース・インスペクション・レポート(FPIR)を要求する
- 寸法チェックの頻度について押出機と合意する。
- QAでストレート/ツイストコントロールを使用する
- トレーサビリティのために文書を保管する
押出材の表面仕上げは、プロファイルの寸法公差に影響しません。.偽
アルマイトやメッキなどの仕上げは寸法を増すので、公差や機械加工許容差を指定する際に考慮しなければならない。.
押し出し形材を伸ばし、内部応力を緩和する。.真
押出成形後、部品は冷却や内部応力によって生じた歪みを整列させ、除去するために延伸を受けることがある。.
プロトタイプ走行はリスクを軽減できるか?
本番前に小規模なトライアルを行うことで、エラーを早期に発見し、後のコストと時間を節約することができる。.
カスタム押出のプロトタイプ生産では、ダイをテストし、寸法を検証し、フローの問題を検出し、本格的な生産前に調整を行うことができます。.
新しいカスタム・プロフィールを作成する場合、プロトタイプや試運転を行うことは、リスクを軽減するための賢明な方法です。以下にその利点と注意点を示します:
プロトタイプ走行の利点
- ダイの性能を検証する
- 寸法精度のチェック
- 下流の問題を特定する
- 仕上げの最適化
- スクラップ費用の最小化
考慮すべきこと
- 成功の定義
- モニター変数
- 反復練習の準備
- コストと時間を考慮する
- ロジスティクスの合意
あなたのビジネスモデルと合致する理由
御社はCNC加工によるカスタムアルミ押出材を供給するB2B企業であるため、大規模な顧客向けの品質管理が不可欠です。試作品を作るということは、押出機と早期に連携し、不測の事態を減らし、顧客の厳しい仕様に対応し、より効率的な生産パイプラインを構築することを意味します。.
メーカーの経験を信頼すれば、押出成形の試作は不要である。.偽
経験豊富な製造業者であっても、新しいプロファイル形状や金型設計が異なる挙動を示すことがある。試作品の作成は、予期せぬ問題を発見するのに役立つ。.
プロトタイプの押出成形を行うことで、本生産に移行する前に、ダイと工程の検証を行うことができる。.真
試運転により、大量生産前にフロー、寸法、仕上げ、プロセス・パラメーターをチェックすることができる。.
結論
カスタムアルミ押出がうまくいくのは、各工程を注意深く行い、ダイスを十分に設計し、寸法を厳密に検証し、試作品を使用してリスクを軽減した場合のみです。.


