
How Do You Install Aluminum or Metal Ceilings?

Transform your space with aluminum or metal ceilings—let’s dive into the installation process!
To install aluminum or metal ceilings, first prepare your workspace, gather necessary tools, and follow a systematic approach involving measurement, suspension setup, baffle attachment, and final adjustments. Proper execution ensures both aesthetic appeal and functional benefits.
While the initial steps provide a quick overview, understanding the nuances of each phase is crucial for a successful project. Dive deeper into this guide to master the installation process and explore expert tips for avoiding common pitfalls.
Aluminum ceilings are corrosion-resistant and durable.True
Aluminum's resistance to corrosion ensures durability, ideal for high-traffic areas.
What Are the Benefits of Choosing Aluminum Ceilings?
Aluminum ceilings are more than just a design choice; they offer a range of practical benefits that make them ideal for both commercial and residential spaces.
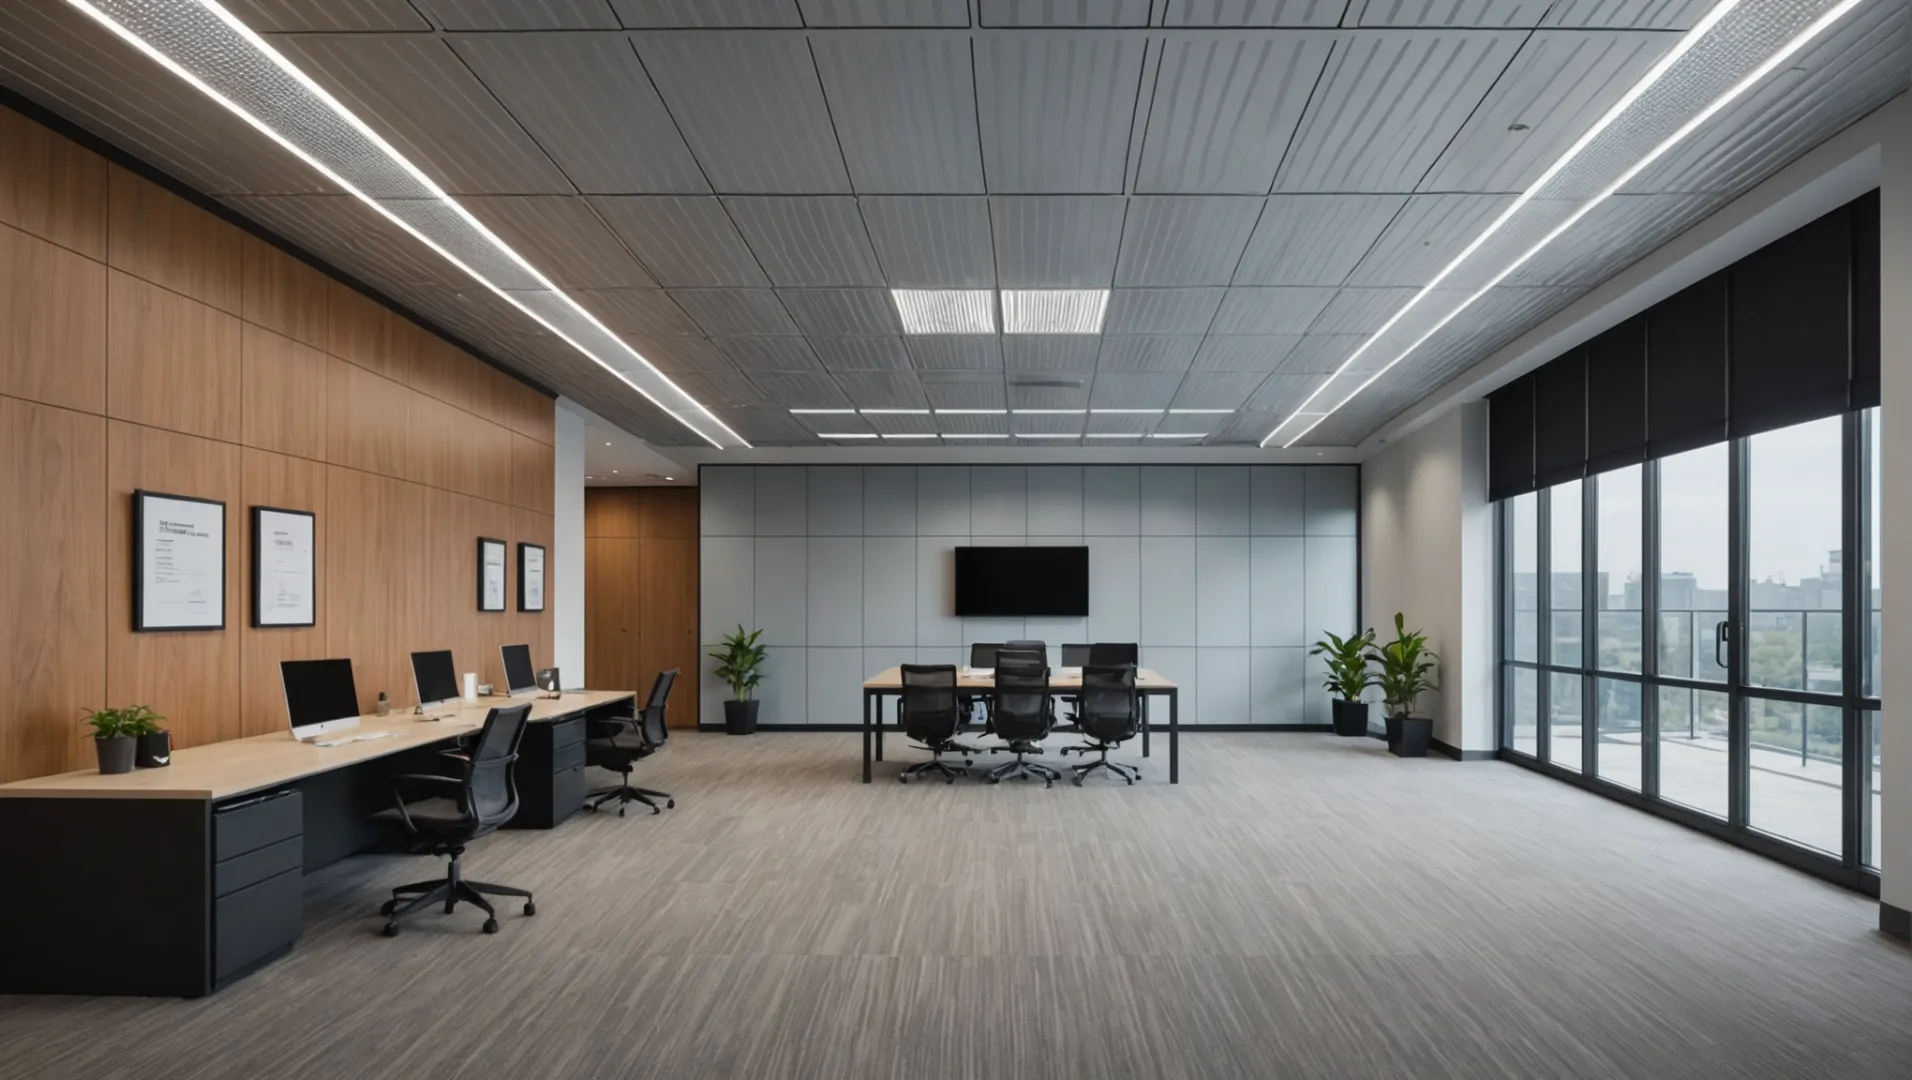
Aluminum ceilings provide durability, low maintenance, and exceptional acoustic properties. They’re lightweight, corrosion-resistant, and customizable, making them suitable for various architectural styles and environments.
Durability and Maintenance
One of the standout advantages of aluminum ceilings is their durability1. Aluminum is a robust material that withstands wear and tear, making it an excellent choice for high-traffic areas such as airports, shopping malls, and office buildings. Unlike traditional materials that may require frequent upkeep, aluminum is corrosion-resistant and can easily withstand humidity and temperature fluctuations without compromising its structural integrity.
This durability translates to low maintenance costs. An occasional wipe-down with a damp cloth is usually sufficient to keep these ceilings looking pristine. This feature is particularly beneficial in environments where reducing maintenance time and costs is a priority.
Acoustic Enhancement
Aluminum ceilings offer remarkable acoustic benefits. When installed correctly, they can significantly reduce noise levels by absorbing sound waves, which is crucial in large spaces like auditoriums and conference halls. The open design of baffle ceilings, in particular, allows for sound absorption while maintaining a modern aesthetic.
In spaces where communication clarity and comfort are essential, such as educational institutions or corporate offices, the acoustic properties of aluminum ceilings can create an environment that enhances concentration and productivity.
Versatile Design Options
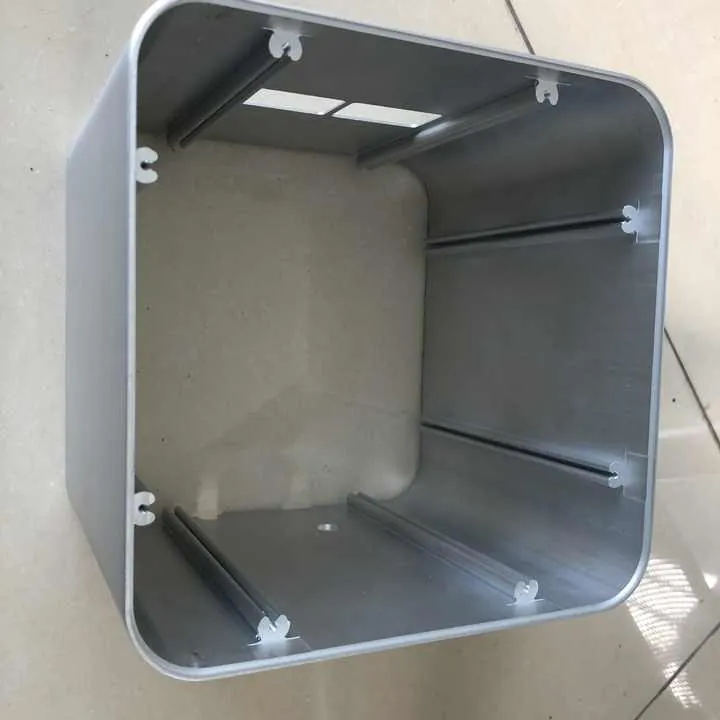
Aluminum ceilings are available in a plethora of designs, colors, and finishes, allowing architects and designers to customize them to fit specific project requirements. Whether you prefer a bold statement with vibrant colors or a minimalist look with sleek lines, aluminum ceilings can be tailored to complement any interior style.
Manufacturers like Forever Aluminum offer extensive customization options, including OEM (Original Equipment Manufacturer) and ODM (Original Design Manufacturer) services. These services enable the creation of unique profiles that cater to individual aesthetic preferences or functional needs.
Environmental Considerations
In addition to their functional benefits, aluminum ceilings are environmentally friendly. Aluminum is 100% recyclable, which reduces the material’s carbon footprint and aligns with sustainable building practices. By choosing aluminum ceilings, you contribute to eco-friendly construction while benefiting from a high-performance material.
Comparison Table: Aluminum vs. Traditional Ceiling Materials
| Feature | Aluminum Ceilings | Traditional Materials |
|---|---|---|
| Durability | High | Moderate |
| Maintenance | Low | High |
| Acoustic Properties | Excellent | Variable |
| Customization Options | Extensive | Limited |
| Environmental Impact | Low (Recyclable) | High (Non-recyclable) |
Choosing aluminum ceilings can significantly enhance both the functionality and aesthetics of your space. Whether prioritizing durability, acoustics, or environmental sustainability, aluminum offers an adaptable solution for modern interior design.
Aluminum ceilings require frequent maintenance.False
Aluminum ceilings are low maintenance, needing only occasional cleaning.
Aluminum ceilings enhance acoustics in large spaces.True
They absorb sound waves, reducing noise levels in large areas.
Which Tools Are Essential for Installing Metal Ceilings?
Installing metal ceilings requires the right set of tools to ensure precision and durability. Without them, you risk misalignment and structural issues.
Essential tools for installing metal ceilings include a tape measure, laser level, hanging wire, brackets, fasteners, and a screwdriver or drill. These tools ensure accurate measurement, proper alignment, and secure installation.

Understanding the Tool Kit for Metal Ceiling Installation
When it comes to installing metal ceilings, having the right tools at your disposal2 can make all the difference between a seamless setup and a frustrating experience.
Measuring Tools
-
Tape Measure: A fundamental tool to accurately gauge the dimensions of your space. It helps in marking precise spots for installation.
-
Laser Level: Ensures that your baffles are perfectly aligned. This tool projects a straight line across your installation area, providing a visual guide that reduces the chance of errors.
Supporting Hardware
-
Hanging Wire: Used to suspend the ceiling panels from the existing structure. It is vital for maintaining the baffles’ height and stability.
-
Brackets and Fasteners: These hold the panels in place. Choosing high-quality brackets ensures that your installation remains secure over time.
Installation Tools
-
Screwdriver or Drill: Depending on your preference, these are used to fix the brackets and fasteners securely.
-
Stud Finder: Helps locate ceiling joists to attach the suspension system securely.
Here’s a quick reference table for the essential tools:
| Tool Type | Specific Tool | Function |
|---|---|---|
| Measuring Tools | Tape Measure | Accurate space measurement |
| Laser Level | Alignment and leveling | |
| Supporting Tools | Hanging Wire | Suspends the ceiling panels |
| Brackets & Fasteners | Secure attachment of panels | |
| Installation | Screwdriver or Drill | Fastening brackets and panels |
| Stud Finder | Locates structural supports |
Preparing Your Workspace
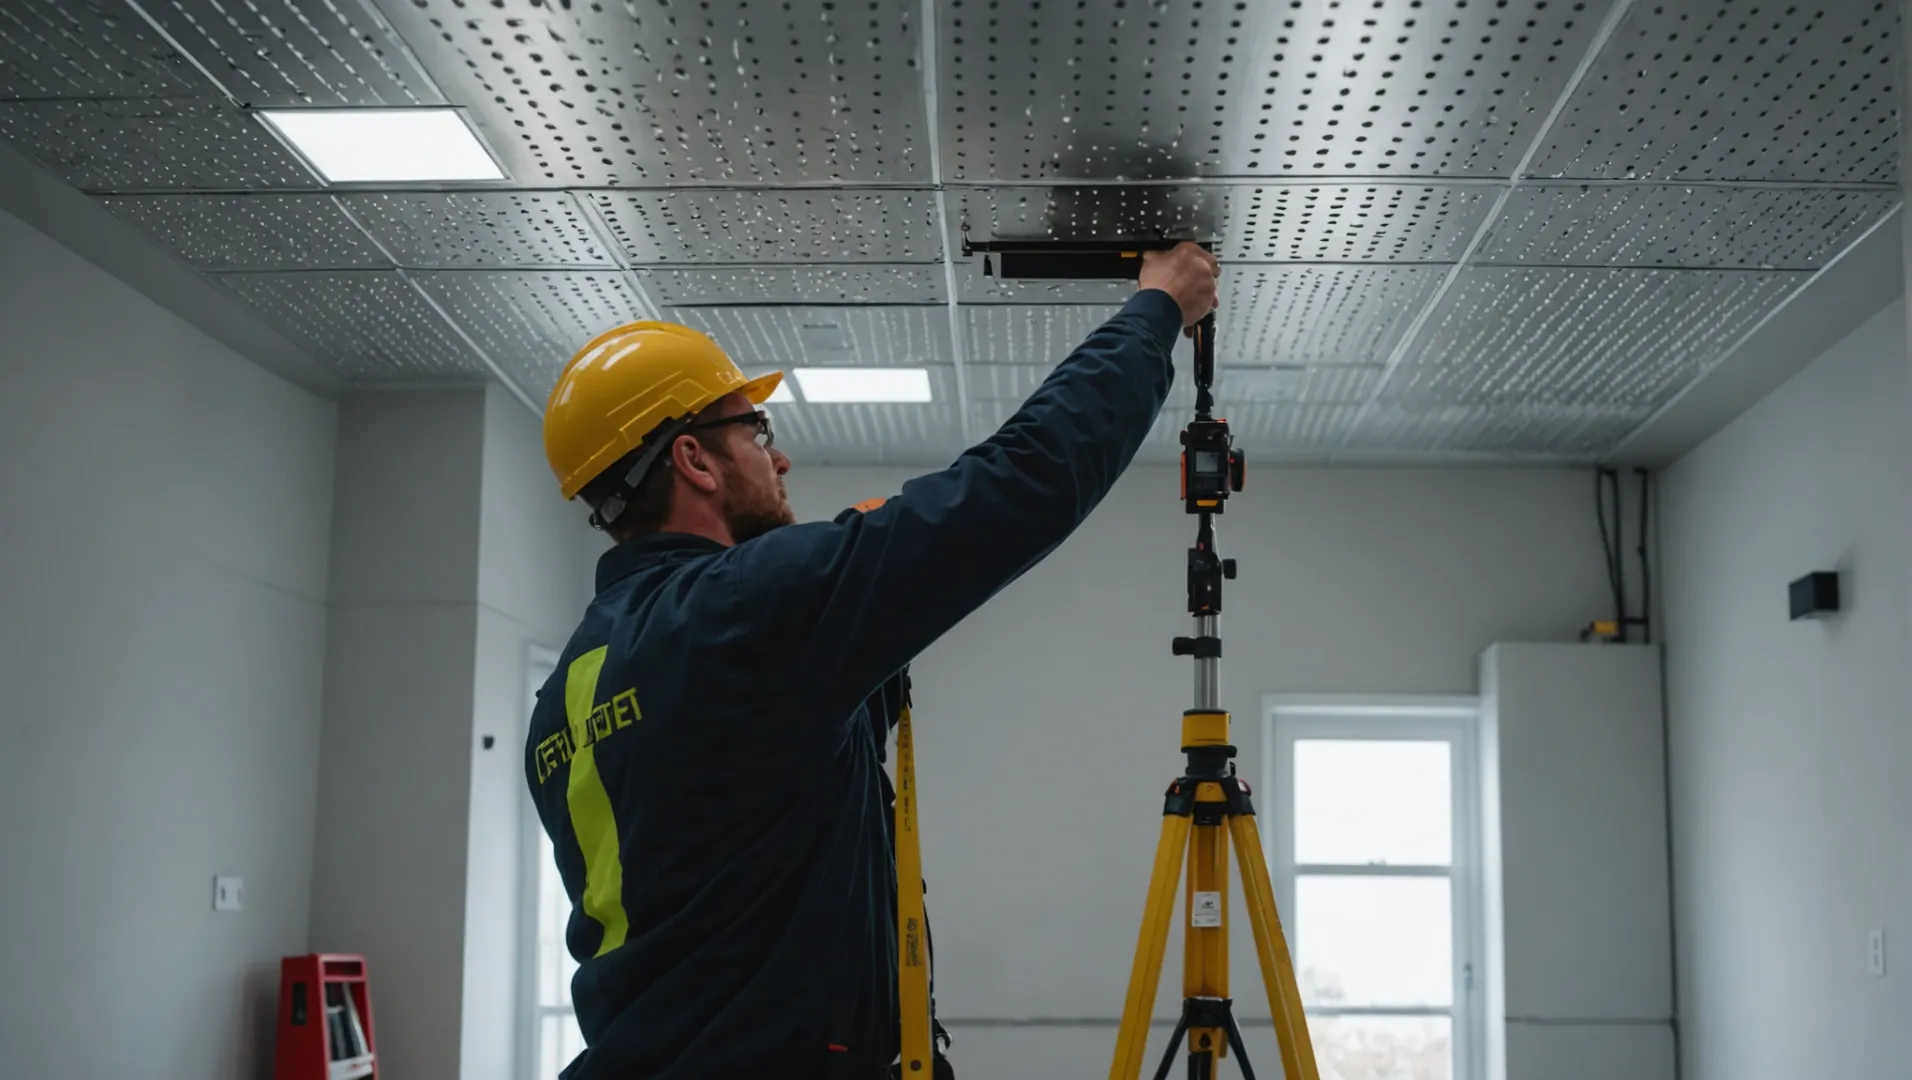
Before you start installing, it’s crucial to prepare your workspace3 adequately. Clear any obstacles, ensure good lighting, and have your tools organized for easy access. This preparation stage sets the tone for a smooth installation process.
Conclusion (Avoid)
Instead of summarizing, think about how each tool enhances precision in installation. Consider visiting specialized forums4 to learn more about innovative tools that might suit unique installation needs.
A tape measure is essential for metal ceiling installation.True
It ensures accurate measurement of space for precise installation.
A hammer is required for installing metal ceilings.False
The tools needed include a screwdriver or drill, not a hammer.
How Do You Ensure Proper Alignment During Installation?
Achieving perfect alignment during the installation of aluminum baffle ceilings is crucial for aesthetics and function. With careful planning, precise measurements, and the right tools, you can ensure a seamless and professional finish.
Ensure proper alignment by measuring accurately, using a laser level for precision, and confirming all components are securely fastened to prevent misalignment.
Understanding the Importance of Alignment
Alignment is key in installing aluminum baffle ceilings because it affects both the visual appeal and structural integrity. Misaligned baffles can lead to uneven acoustics, compromised aesthetics, and even potential safety hazards. Proper alignment ensures that each panel is securely attached, enhancing the overall appearance and functionality.
Tools for Accurate Alignment
Before beginning installation, gather essential tools such as a tape measure, laser level, spirit level, and chalk line. These tools help ensure that your measurements are precise and that each baffle is installed at the correct height and spacing. Using a laser level5 can be particularly helpful in projecting a straight line across a long span, ensuring consistency across the entire ceiling.
Step-by-Step Alignment Process
-
Preparation:
- Clear the workspace of any obstacles to ensure an accurate starting point.
- Assemble all tools and materials within easy reach to avoid disruptions during installation.
-
Initial Measurements:
- Measure the dimensions of the room to determine the layout and spacing of the baffles.
- Use a tape measure to mark key points where suspension wires or brackets will be fixed.
-
Using a Laser Level:
- Set up the laser level at one end of the room.
- Adjust it to project a horizontal line along the wall or ceiling where the baffles will be installed.
- Use this line as a guide to mark precise positions for each bracket or suspension wire.
-
Installing Suspension System:
- Attach suspension wires or brackets according to your markings.
- Double-check each attachment point with a spirit level to ensure it aligns with the laser line.
- Secure all fixtures tightly to prevent any shift during the installation of baffles.
-
Attaching Baffles:
- Begin attaching aluminum baffles to the suspension system, aligning each one with your pre-marked points.
- Continuously check alignment using both visual inspection and your laser line guide.
Final Checks and Adjustments
Once all baffles are in place, step back and visually assess the overall alignment. Make minor adjustments as needed to correct any discrepancies. Use your laser level again to ensure every baffle maintains a uniform height and spacing throughout the ceiling.
Incorporating these steps with attention to detail will lead to an impeccable installation that enhances both the acoustic quality and aesthetic appeal of your space.
Using a laser level ensures perfect alignment.True
Laser levels project straight lines, aiding precise alignment.
Misaligned baffles improve acoustic quality.False
Misalignment causes uneven acoustics, reducing sound quality.
What Mistakes Should You Avoid When Installing Metal Ceilings?
Installing metal ceilings can elevate a space’s aesthetics, but common mistakes can derail the process. Learn which pitfalls to avoid for a seamless installation.
Avoiding common mistakes like incorrect measurements, inadequate support systems, and poor alignment can ensure a successful metal ceiling installation. Ensuring precise planning and execution helps maintain the ceiling’s aesthetic and functional integrity.

1. Neglecting Accurate Measurements
A fundamental mistake is neglecting to measure accurately before installation begins. Incorrect measurements can lead to misaligned panels and gaps that are not only unsightly but also compromise the acoustic properties of the ceiling.
- Solution: Use a tape measure and laser level for precision. Double-check measurements and mark positions clearly before proceeding.
2. Insufficient Support Structure
Another frequent error is underestimating the importance of a robust support system. Without proper support, metal panels can sag or fall, posing safety risks and damaging the ceiling’s appearance.
- Solution: Ensure that suspension wires or brackets are securely fastened to the ceiling. The support system should be capable of holding the weight of the metal baffles over time.
3. Ignoring Manufacturer Instructions
Manufacturers provide detailed instructions tailored to their products, yet ignoring these guidelines is a common misstep. This oversight can lead to improper installation and void warranties.
- Solution: Familiarize yourself with the installation manual provided by the manufacturer. Follow each step carefully to ensure compliance with their standards.
4. Improper Alignment of Panels
Aligning panels incorrectly not only affects aesthetics but also the overall functionality of the ceiling, particularly its acoustic performance.
- Solution: Continuously check alignment during installation using a laser level. Adjust as necessary to maintain consistent spacing and straight lines.
5. Overlooking Final Adjustments
Skipping the final inspection and adjustment phase can result in a lackluster finish. Loose fittings or misaligned panels can reduce both the visual appeal and effectiveness of the ceiling.
- Solution: Conduct a thorough post-installation inspection. Adjust baffles as needed to achieve a uniform look and ensure all elements are securely fastened.
By avoiding these common mistakes, you can achieve a flawless metal ceiling installation6 that enhances both the look and functionality of your space.
Incorrect measurements lead to panel misalignment.True
Accurate measurements prevent gaps and maintain ceiling aesthetics.
Ignoring manufacturer instructions can void warranties.True
Following guidelines ensures proper installation and warranty validity.
Conclusion
By following these guidelines, you’ll create a stunning ceiling that enhances both aesthetics and acoustics. Embrace the journey of transformation!
-
Discover how durable materials extend the lifespan of ceiling installations.: They offer superior thermal and acoustic insulation depending on their installation. They can receive different finishes and are quite durable … ↩
-
Learn about must-have tools for precise metal ceiling installation.: What tools do you need to install a standing seam metal roof? In this article, we discuss aviation snips, shears, flangers, edge markers, and more. ↩
-
Discover tips on organizing your workspace for efficient installation.: In this video, I show how to install a metal ceiling. Often times you will see metal ceiling … ↩
-
Engage with communities for innovative installation tips.: I will do most or all the installation by myself and am looking for recommendations on technique and equipment. The ceiling is 12′ 4 1/2” to the … ↩
-
Discover top-rated laser levels for precise ceiling alignment tasks.: To find the best laser level, the tool experts at HGTV selected 12 popular laser levels from brands like DeWalt, Klein Tools, SKIL and more. ↩
-
Discover detailed strategies for avoiding installation errors.: 1. Incorrect Measurements · 2. Choosing The Incorrect Metal Roofing Panel · 3. Installing Fasteners Incorrectly · 4. Oil Canning · 5. Underlayment. ↩

