
Átfogó útmutató az alumínium csempeburkolathoz?

I often face worry when I start a home project. I worry about the final look. I wonder if I chose the right trim. Aluminum tile trim matters more than I first thought. It gives a clean edge, hides raw tile ends, and adds a neat finish.
Aluminum tile trim is essential because it protects tile edges, gives a polished look, and makes cleaning easier. It also hides cutting flaws and helps tiles last longer, offering both function and style.
I want to help you see why this trim matters. I will guide you on picking size and shape, installing it, and keeping it clean. Stick with me, and your tile project will look sharp.
What makes aluminum tile trim essential in home projects?

Aluminum tile trim matters. I have seen trims crack or chip when not used right. It protects tile edges from damage. It stops chipping when people bump or drop things. It keeps corners strong. It shuts out moisture from raw edges.
It also gives a clean finished look. I have a friend who had rough edges showing. She used trim. The whole wall looked neat and more professional. It adds a mix of function and style.
It helps tiles last longer. I once saw tile edges get weak over time. The trim kept them stable. It works like a guard. It also helps with cleaning. Without trim, grout might wear edges. If water gets in, edges can crack. Trim seals it. It closes gaps. It gives a barrier. That stops grime build-up.
Function and style meet with aluminum trim. It comes in different shapes. It can match your design. It fits modern or classic looks. I use trim that matches my faucet finish. It ties the room together.
| Legfontosabb előnye | Miért fontos |
|---|---|
| Edge protection | Stops chipping and cracking where tile cuts are exposed |
| Better look | Hides rough edges and gives a clean, professional feel |
| Lasts longer | Keeps corners safe, prevents moisture and wear |
| Könnyen tisztítható | Seals joints, blocks dirt and water from sticking |
Aluminum tile trim protects tile edges and prevents damage.Igaz
It forms a metal barrier at tile edges that resists chipping and moisture, prolonging tile life.
Aluminum tile trim is purely decorative and does not help with tile durability.Hamis
It provides both aesthetic and functional benefits, including edge protection and seal.
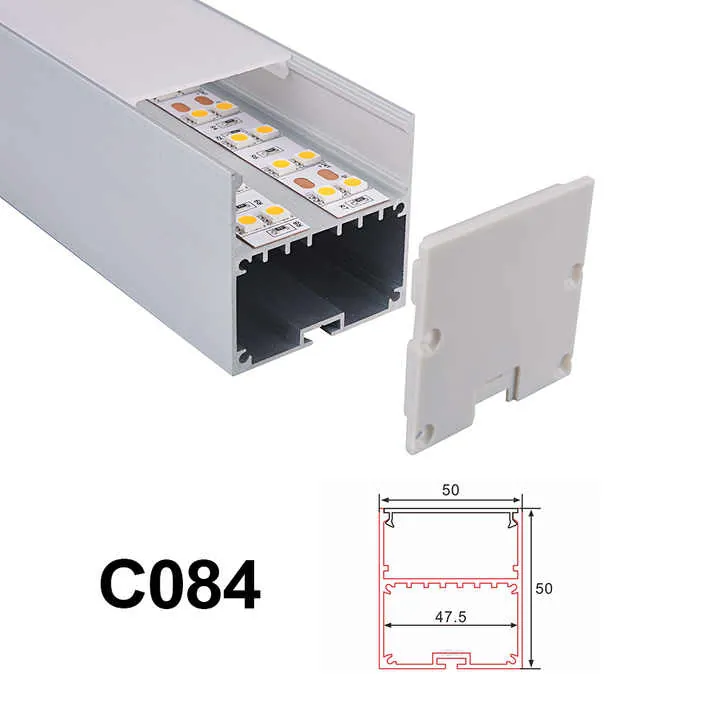
How to choose the right aluminum tile trim size and profile?

It is hard to pick the right trim. I once bought one that was too small. It left a gap. So I learned to check tile thickness, edge depth, and look. Measure tile thickness. Trim needs to cover that plus grout. Profiles vary. Some match tile surface height. Others stand proud for effect.
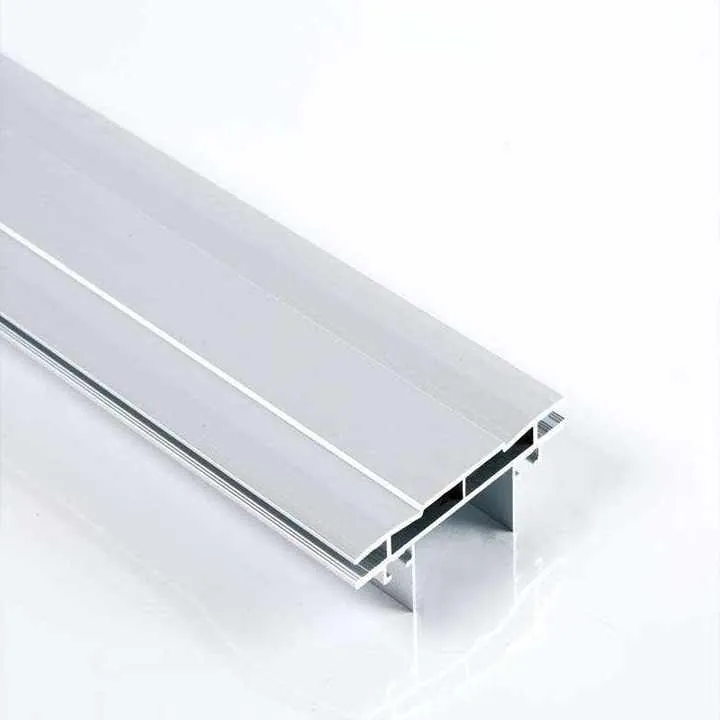
Think of profile shapes: l-shaped, flat edge, stair-nose, bullnose, or transition. l-shaped covers two edges. Stair-nose hides edge at step or threshold. Flat edge trims at wall edges. Transition trims edge between tile and another floor. Pick profile by where trim goes.
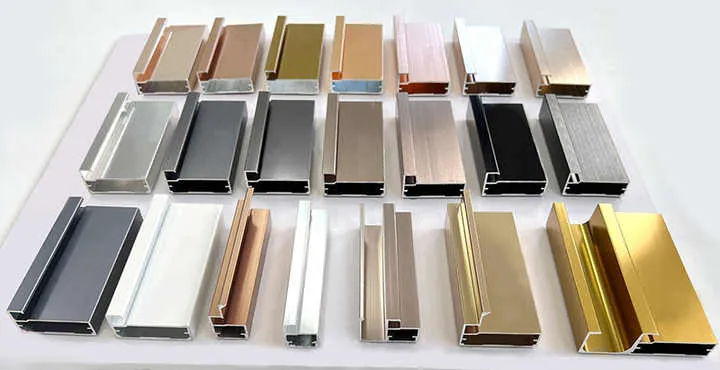
Design matters too. I compare finishes: brushed, anodized, coated, polished. I match faucet or cabinet pull finish. Make trim part of the room style.
Step-by-step size and shape guide
- A csempe vastagságának mérése – use a ruler.
- Add grout width – trim must cover tile plus room for grout.
- Pick profile by location – wall edge, threshold, step, or transition.
- Check flush or edge height – choose a tight or bold look.
- Match finish with fixtures – for cohesive look in room.
| Point to consider | Mi a teendő |
|---|---|
| Csempe vastagsága | Measure tile fully to pick proper trim depth |
| Grout space | Include grout so trim fits snugly |
| Trim profile | Choose l-shape, stair-nose, bullnose, transition |
| Height/Flush match | Decide if trim aligns flush or stands out |
| Finish match | Align trim finish with room’s metal accents |
Choosing the right profile depends on where the trim will go.Igaz
Different profiles suit wall edges, thresholds, steps, or transitions.
Any trim profile works anywhere regardless of tile location.Hamis
Profiles are designed for specific functions and locations.
What are the installation steps for aluminum tile trim?
I was nervous when I installed trim the first time. It seemed tricky. But I broke it into small steps. I want you to feel the same confidence.
Start with clean, dry tile surface. Rough or dusty surfaces cause trim to slip. Next, dry-fit trim. Place it along the tile edge. Make sure it aligns with tiles and grout. Then cut trim to length. I use a hacksaw or aluminum cutter. Cut straight. Use file to smooth edges.
Apply thin-set mortar along edge. I use same thin-set as tile. Spread even layer. Then press trim into mortar. Tap lightly with rubber mallet. Make sure trim aligns properly. Clean excess mortar right away.
Let mortar cure. Follow mortar instructions. Usually 24 hours. Then grout edge between tile and trim. Use matching grout and color. Wipe clean. Let grout dry. Seal grout if needed.
Quick install overview
- Clean tile edges well.
- Dry-fit and mark trim length.
- Cut trim with proper tool.
- Apply thin-set mortar where trim goes.
- Press trim in, align, tap gently.
- Clean excess mortar.
- Let mortar cure fully (often 24?hrs).
- Grout edges, wipe clean.
- Let grout dry and seal if needed.
| Lépés | Mi a teendő |
|---|---|
| 1. Prepare surface | Clean tile edges to remove dust and debris |
| 2. Dry-fit trim | Place trim and ensure it aligns with tile and grout |
| 3. Cutting trim | Cut to correct length, then file edges smooth |
| 4. Apply mortar | Use thin-set to secure trim firmly |
| 5. Install trim | Press in, align, tap with rubber mallet gently |
| 6. Clean up | Remove excess mortar before it hardens |
| 7. Cure time | Wait for recommended curing time (often 24 hours) |
| 8. Grout and finish | Grout edge, wipe, let dry, and seal if desired |
Letting the thin-set mortar fully cure before grouting is important.Igaz
Curing ensures trim stays in place and grout sets well.
It is okay to grout before the mortar sets fully.Hamis
Doing so can shift trim and weaken the bond, causing misalignment.
How to maintain and clean aluminum tile trim?
I once cleaned trim wrong. I used abrasive paste and scratched it. Now I use soft methods. I clean often with mild soap and water. I use soft cloth or sponge. Hard scrubbers can scratch finish. I rinse and dry to prevent water spots.
For stubborn dirt or grout haze, I use vinegar-based cleaner (mild acid). I test on a small area first. I rinse well after. Dry with soft cloth. I avoid bleach or harsh acids. They may damage anodized or coated finish.
Regularly inspect trim. I look for chips or dents. If I see damage, I sand lightly with fine sandpaper (very fine grain). Then I clean and apply clear protective spray if needed. It helps guard finish.
For shine, I use aluminum polish, but only on bare or brushed finishes. If finish is coated, skip polish. Always read maker instructions.
| Cleaning situation | Mi a teendő |
|---|---|
| Rutin tisztítás | Use mild soap, warm water, soft cloth, then dry |
| Grout haze or mild stains | Use mild vinegar mix, rinse, dry with soft cloth |
| Scratches or dents | Sand lightly with fine sandpaper, then clean |
| Coated finish | Avoid abrasives or polish, just clean and rinse |
| Bare or brushed finish | Use aluminum polish if desired, follow instructions |
Harsh chemical cleaners can damage aluminum trim finish.Igaz
Acidic or abrasive cleaners can erode coatings or scratch finishing.
It is fine to use steel wool on aluminum trim for quick cleaning.Hamis
Steel wool is abrasive and will scratch and damage the finish.
Következtetés
Aluminum tile trim is a small detail with big impact. It protects tile edges, makes your work look clean, and helps tile last. I walked you through choosing the right trim, how to install it, and how to keep it looking great with simple care. Use smart yet easy steps, and your tile finish will impress for years.

