
¿Qué materiales y herramientas se necesitan para instalar baldosas?

Una vez arranqué un suelo viejo y me sentí perdido. Necesitaba las herramientas y los materiales adecuados. Entonces el trabajo se hizo fácil. Ahora te cuento cómo prepararte antes de empezar.
Se necesitan herramientas para cortar y colocar las baldosas, el adhesivo adecuado para el tipo de baldosa, un contrapiso estable si es necesario y equipo de seguridad.
Déjame guiarte paso a paso para que puedas evitar errores y obtener resultados impecables.
¿Qué herramientas son indispensables para cortar y colocar baldosas?
Preparé mi espacio de trabajo y estaba deseando empezar. Entonces me di cuenta de que había olvidado el cúter adecuado y el proyecto se estancó. Eso me enseñó lo vitales que son las herramientas.
Para cortar y colocar baldosas, las herramientas esenciales incluyen un cortador de baldosas o una sierra húmeda, llanas, separadores, maza de goma y nivel.
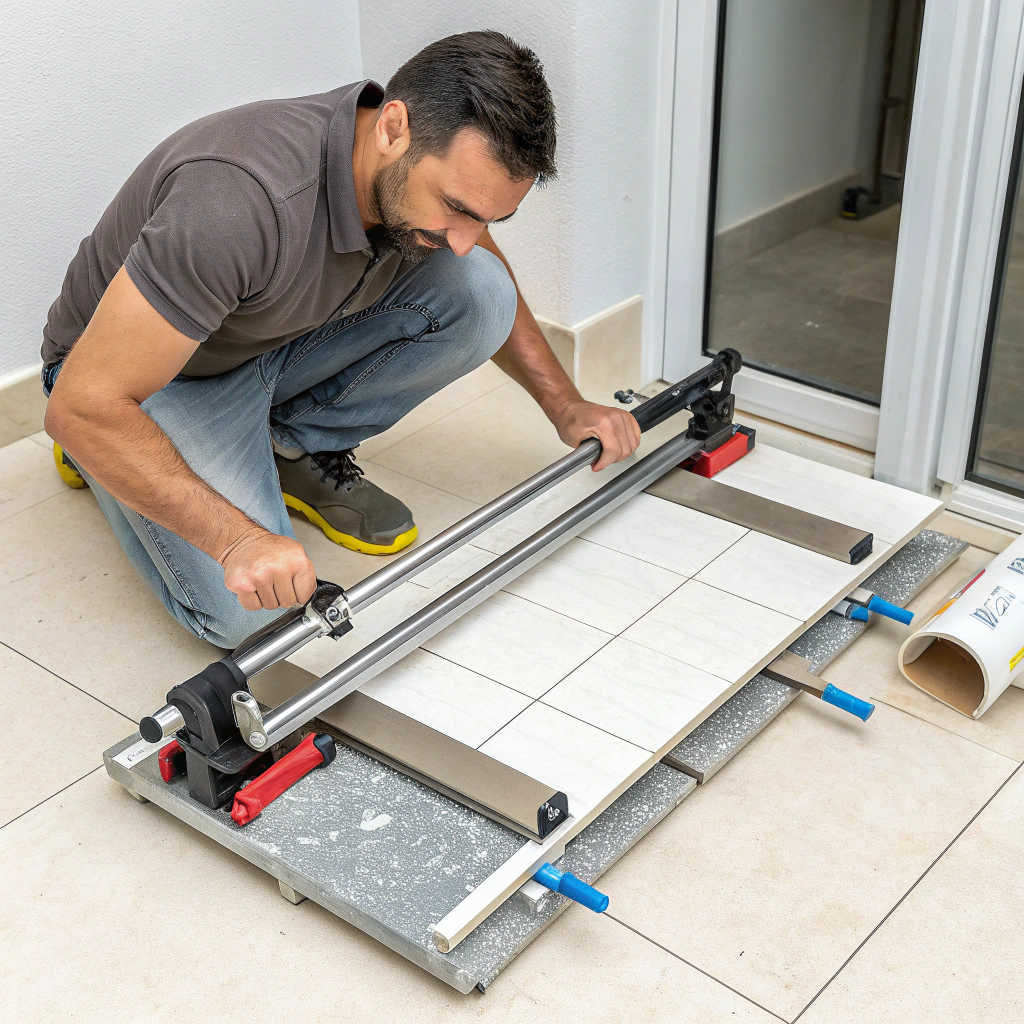
Siempre empiezo con un buen cortador de azulejos o una sierra húmeda. El cortador es ideal para cortes rectos en cerámica. La sierra húmeda es adecuada para materiales duros como la porcelana o la piedra y proporciona bordes lisos. También utilizo una llana dentada para extender el adhesivo uniformemente. Los separadores de azulejos mantienen las líneas de lechada uniformes. Un mazo de goma me ayuda a enrasar suavemente las baldosas. Un nivel garantiza que todas las baldosas queden planas y alineadas.
Aprendí a medir a menudo con una cinta métrica y a marcar las baldosas con lápiz antes de cortar. Mis herramientas favoritas también incluyen un flotador para lechada, una esponja, un cubo y rodilleras para trabajos largos. Preparo el adhesivo en un cubo mezclador con un taladro de pala para grandes superficies. Una amoladora angular pequeña con disco de diamante es útil para formas extrañas o recortes.
Cuando utilicé por primera vez una cuchilla básica y una llana manual, vi cómo los cortes desiguales y los huecos dañaban el acabado. Entonces mejoré. Ahora cada herramienta hace el trabajo más rápido y limpio.
Tabla comparativa de herramientas
| Herramienta | Caso práctico |
|---|---|
| Cortadora manual de azulejos | Cortes rectos en cerámica |
| Sierra húmeda | Corte de porcelana, piedra, baldosas grandes |
| Llana dentada | Aplicación uniforme del adhesivo |
| Distanciadores de baldosas | Líneas de lechada uniformes |
| Mazo de goma y nivel | Nivelación y colocación de baldosas |
| Flotador de lechada y esponja | Rejuntado y limpieza tras la instalación |
Una sierra húmeda es esencial para cortar azulejos de porcelana o piedra de forma limpia.Verdadero
Las sierras húmedas manipulan materiales duros con precisión manteniendo los cortes fríos.
Sólo necesita un cuchillo para cortar todo tipo de baldosas.Falso
Un cuchillo no puede cortar baldosas duras o gruesas con precisión; se necesitan cortadoras de baldosas o sierras adecuadas.
¿Qué tipo de adhesivo es mejor para los distintos azulejos?
Una vez pegué azulejos de porcelana con mortero normal para cerámica. La unión falló y la lechada se agrietó a los pocos días. Ese error me enseñó a adaptar el adhesivo a la baldosa.
Utilizar mortero de capa fina modificado para porcelánico y piedra. Utilice mortero de capa fina no modificado para baldosas de vidrio o con soporte de resina, y masilla para baldosas cerámicas de pared.
La porcelana y la piedra natural son densas y pesadas. Yo utilizo mortero de capa fina modificado con polímeros porque se adhiere mejor y resiste la flexión. Para baldosas de vidrio o baldosas sobre superficies delicadas, utilizo mortero de capa fina no modificado. Necesita el soporte del fabricante del azulejo y se cura con agua, creando una unión fuerte. Para los azulejos pequeños de cerámica de pared, la masilla funciona rápidamente: el secado a temperatura ambiente acelera el proyecto, pero yo no la uso en zonas húmedas ni en suelos.
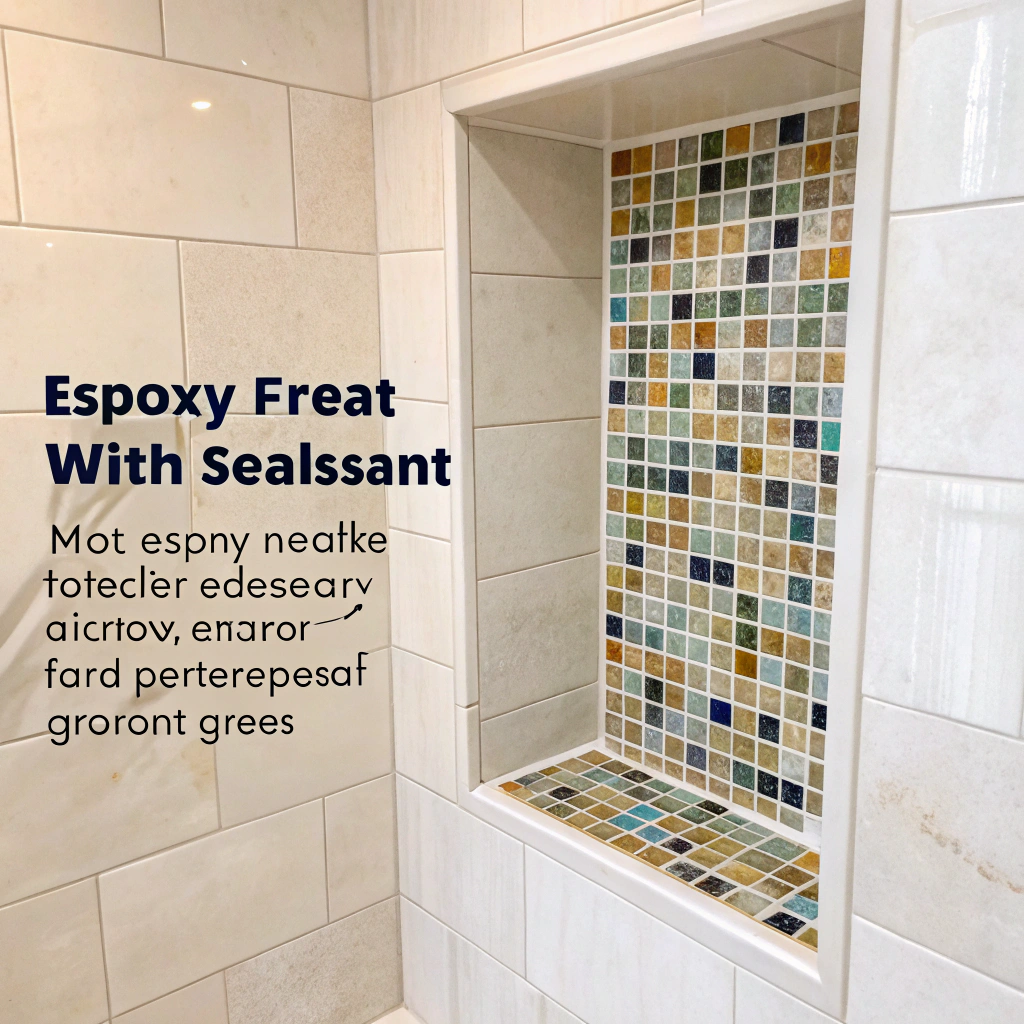
Una vez probé el adhesivo epoxi para azulejos de mosaico en un nicho de ducha. Era sucio pero impermeable. Yo sólo utilizo epoxi para zonas muy húmedas o suelos lavados al ácido. El coste es mayor, pero el resultado es duradero.
Esto es lo que guardo en mi caja de herramientas:
- Mortero de capa fina modificado para suelos, duchas, baldosas densas
- Cemento-cola no modificado para instalaciones de vidrio y placas de base
- Masilla para paredes interiores alejadas del agua
- Epoxi para zonas expuestas al agua o a productos químicos
Mezclo el cemento-cola hasta obtener una consistencia de mantequilla de cacahuete. Compruebo las directrices del fabricante sobre la vida útil y el tiempo abierto. Cuando apresuraba la mezcla sin comprobarlo, la unión se debilitaba. Ahora sigo los tiempos al pie de la letra.
Tabla comparativa de adhesivos
| Tipo de baldosa / Superficie | Mejor tipo de adhesivo |
|---|---|
| Porcelana / Piedra | Mortero de capa fina modificado con polímeros |
| Vidrio / Resina | Cemento-cola no modificado |
| Cerámica mural (zonas secas) | Masilla |
| Húmedo o de alta humedad | Mortero epoxi |
El cemento-cola modificado es la mejor opción para las baldosas de gres porcelánico.Verdadero
Tiene polímeros que mejoran la adherencia en baldosas densas sometidas a tensión.
La masilla funciona bien para baldosas en zonas húmedas.Falso
La masilla no es lo suficientemente resistente al agua para zonas o suelos húmedos; se necesita un mortero de capa fina o epoxi.
¿Es necesario un contrapiso antes de instalar las baldosas?
Una vez alicaté directamente sobre vinilo viejo. El resultado se agrietó. Aprendí que el contrapiso es clave para un suelo sólido.
Sí, a menudo se necesita un contrapiso, como una placa de cemento, una membrana o una capa de desacoplamiento. Proporciona estabilidad, protección contra el agua y prevención de grietas.

Siempre preparo primero el suelo o la pared. En los suelos, instalo placas de cemento atornilladas sobre contrachapado plano. Es una capa inferior resistente que no se dobla. En los suelos de madera, a veces añado una membrana de desacoplamiento como la Ditra de Schluter. Absorbe el movimiento y evita que las baldosas se agrieten.
Para zonas húmedas como duchas, impermeabilizo con una membrana o barro. Coloco una base impermeable y luego una membrana impermeable adherida. Esto impide que el agua llegue a la estructura inferior. Cuando me salté esto, la lechada se volvió negra de moho al cabo de unos meses.
En casos sencillos de pared seca, alicato directamente sobre placa de cemento o cartón verde. Sé que la pared no se moverá, así que los azulejos permanecen intactos.
El contrapiso también ayuda a evitar que las baldosas suenen huecas. Si la superficie es demasiado lisa o blanda, las baldosas no se adhieren bien y suenan apagadas al pisarlas.
Compruebo el sustrato. Si parece elástico o presenta costuras, lo arreglo primero. De lo contrario, mis baldosas fallarán con el tiempo.
Se recomienda utilizar placas de cemento como base para la mayoría de las instalaciones de baldosas.Verdadero
Proporciona una superficie estable y resistente al agua que soporta las baldosas.
Puede omitir el contrapiso en cualquier superficie siempre que tenga un aspecto liso.Falso
Incluso las superficies lisas pueden flexionarse o atrapar la humedad sin una base adecuada.
¿Qué equipo de seguridad debe utilizar al instalar baldosas?
Una vez corté baldosas sin gafas. Me entró una esquirla en el ojo. Aquel momento hizo que no volviera a saltarme la seguridad.
Lleve gafas de seguridad, guantes, mascarilla antipolvo y rodilleras. Le protegerán los ojos, las manos, los pulmones y el cuerpo durante el corte y la colocación de baldosas.
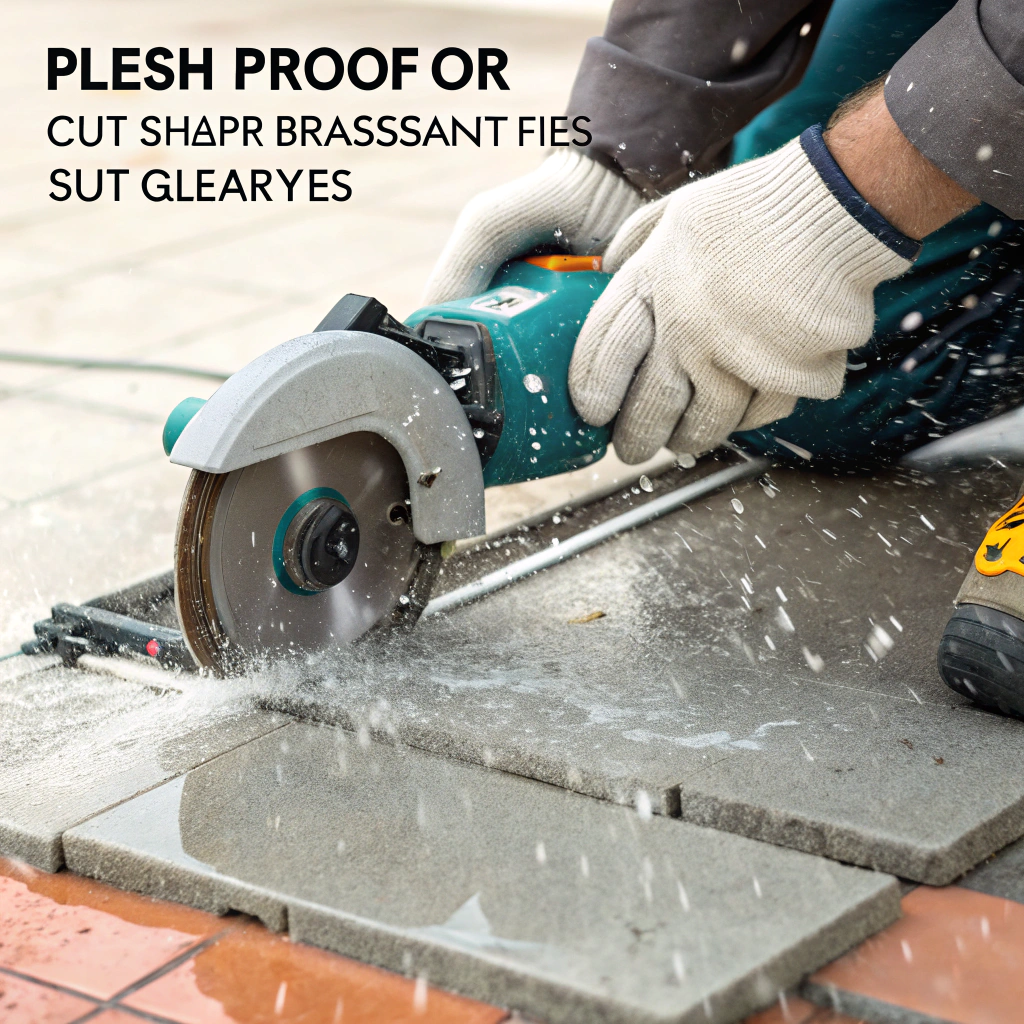
El corte de baldosas genera polvo y fragmentos afilados. Yo siempre llevo gafas de seguridad. Y cuando se utiliza una sierra o amoladora húmeda, el agua salpica, por lo que es mejor llevar gafas a prueba de salpicaduras. Utilizo guantes resistentes a los cortes para agarrar las baldosas y extender el mortero. Las baldosas son afiladas y el mortero áspero.
El polvo del cemento-cola y de la lechada irrita los pulmones y la piel. Yo me pongo una máscara antipolvo o una mascarilla si estoy cortando en seco o mezclando adhesivo. Así me ahorro la tos y los sarpullidos posteriores. Lo aprendí por las malas cuando ignoré esto en mi primer trabajo: me ardió la garganta durante días.
Para trabajar en el suelo, paso mucho tiempo arrodillado. Las rodilleras protegen las articulaciones y me permiten trabajar cómodamente sin dañarme. En los trabajos largos, también uso protección para los oídos cuando lijo o utilizo herramientas ruidosas.
A veces estoy en un sitio desordenado. Me pongo ropa vieja o un mono de trabajo. Enjuago el mortero y el polvo en cuanto acabo. Me ayuda a mantener la piel y las herramientas limpias.
Tabla de equipos de seguridad
| Equipamiento | Propósito |
|---|---|
| Gafas de protección | Proteger los ojos del polvo y los fragmentos de baldosas |
| Guantes | Proteger las manos de cortes y productos químicos |
| Máscara antipolvo | Evitar la inhalación de polvo de adhesivo y lechada |
| Rodilleras | Proteger las rodillas durante el trabajo prolongado en el suelo |
El uso de gafas de seguridad es esencial al cortar o mezclar materiales para baldosas.Verdadero
Protege los ojos de las esquirlas y las salpicaduras.
Los guantes y las mascarillas son opcionales si se trabaja con cuidado.Falso
Los productos químicos y el polvo fino pueden dañar la piel o los pulmones, incluso teniendo cuidado.
Conclusión
Para instalar bien las baldosas hace falta algo más que pegamento y baldosas. Reúno mis herramientas, elijo el adhesivo adecuado, preparo el subsuelo y me pongo el equipo de seguridad. Siguiendo estos pasos, siempre consigo un trabajo suave y duradero.

