
How To Customize Your Aluminum Enclosures?

I see many people worry about enclosure fit and performance. A good custom build can solve that.
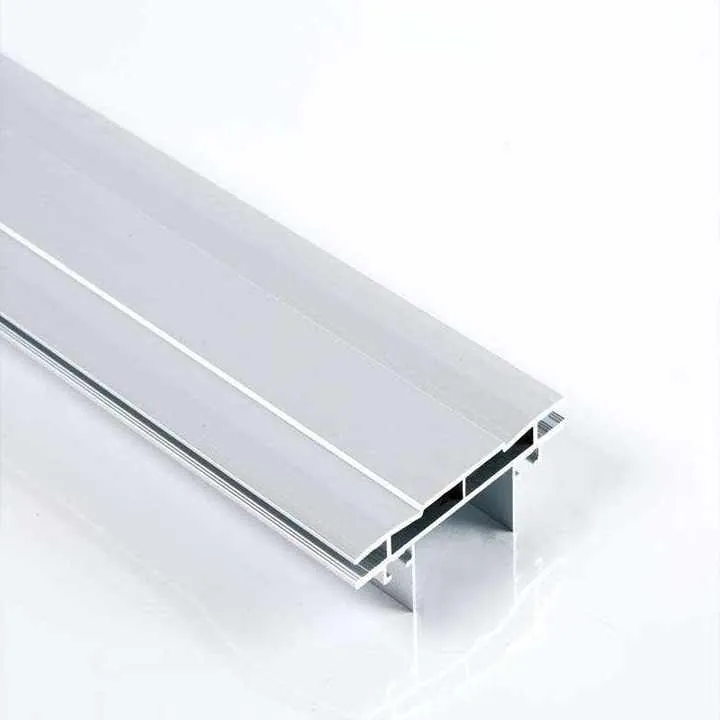
Custom aluminum enclosures serve specific device needs, cooling, aesthetics, and mounting ease.
Let me walk you through the key steps and decisions below.
What factors affect aluminum enclosure customization?
I often hear concerns about size mismatch and thermal needs. People want fit and function.
Factors include device dimensions, thermal performance, structural strength, aesthetics, mounting, and compliance.
I explain each.
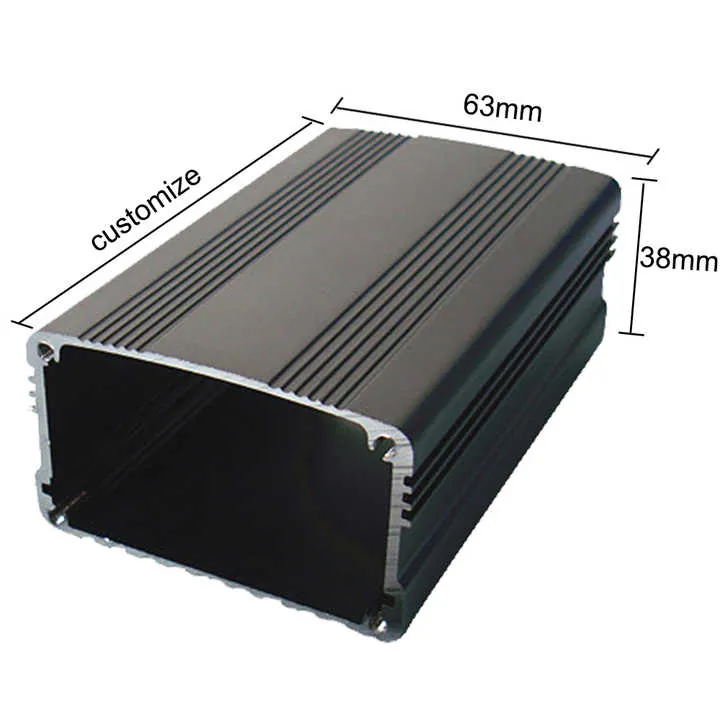
Device size and layout matter. You need internal space for PCB, wiring, connectors, brackets. You must allow clearances for airflow or insulation.
Thermal needs are key. If device runs hot, you need profiles with fins or heat spreaders. You may need ventilation holes or active cooling.
Structural load matters. If the enclosure holds heavy parts or must resist impact, choose thicker walls or ribbed profiles.
Environmental exposure is critical. Outdoor units need corrosion-resistant finishes. Some use IP sealing or g-series foam gaskets.
Mounting style matters. You may need flanges, brackets, DIN rails, stand-offs, panel cut-outs or cable glands.
Aesthetic and branding matter. You choose color, texture, logo engraving or plaque area.
Regulatory compliance matters. You may need UL, CE, RoHS or EMC shielding.
These factors shape customization. You balance function, cost and production complexity.
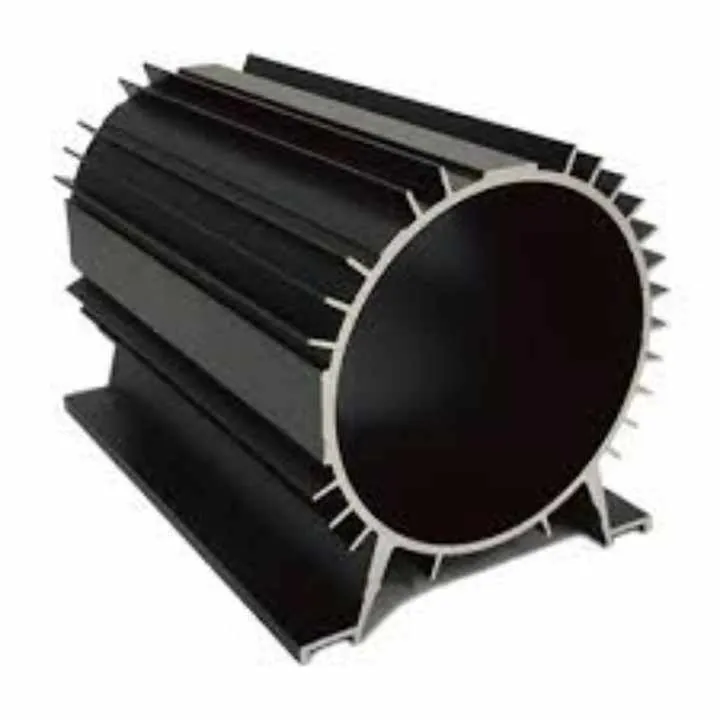
How do you choose the right profile section for heat dissipation?
Many worry devices overheat. Choosing profile section helps cool.
Select aluminum profiles with fins or wide surface area that act as heat sinks and support airflow channels.

I dive deeper on thermal design.
Thermal profile design
Profiles with fins increase surface area. More fins mean more cooling. Horizontal fins shed heat by natural convection. Vertical fins work with airflow fans.
Aluminum alloy and thickness
Alloy 6063-T5 or 6061-T6 are common. Thicker wall improves conduction but adds weight. Use alloys with good thermal conductivity.
Internal airflow
Profiles should allow air to move inside. Add vents or mesh zones near hot spots. Align inlet and outlet vents to channel flow.
Active vs. passive cooling
Passive cooling works if power is low. If heat is high, design space for a fan or blower. Provide mounting holes or grill.
Thermal paths
Mount components to side walls or fins. Use thermal pads from chip to metal. Use thermal epoxy or heat spreaders to conduct heat.
Example profile comparison
| Profile Type | Surface Area | Cooling Effect | Cost |
|---|---|---|---|
| Flat wall | Low | Minimal | Low |
| Few fins | Medium | Moderate | Moderate |
| Multi-fin wall | High | Strong | Higher |
A well-chosen section lets heat spread and dissipate fast. It makes device run cooler and longer.
What surface treatments are available?
People ask: how to protect and style my enclosure?
You can use anodizing, powder coating, brushing, polishing, or wood print to enhance strength and look.
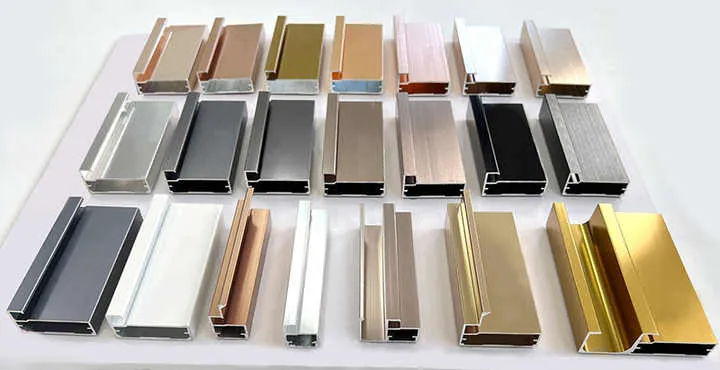
I explain options.
Anodizing adds oxide layer. It protects against corrosion and abrasion. It gives natural metallic sheen or dyed colors. It is durable and thin.
Powder coating applies colored durable paint. It resists chips, UV and outdoor damage. Many color options exist. Thickness is higher than anodizing.
Brushing uses mechanical brushes to create linear grain. It gives matte finish and hides minor wear. Often paired with anodizing or coating.
Polishing smooths surface to mirror shine. It suits decorative or reflective units. It needs more care and buffing.
wood-grain print applies decorative veneer or sublimation film. It gives natural look. It is less durable outdoors but good for interior products.
Surface Treatment Comparison Table
| Treatment | Appearance | Durability | Corrosion Resistance | Cost |
|---|---|---|---|---|
| Anodizing | Metallic sheen or color | High | Excellent | Moderate |
| Powder Coating | Matte or glossy color | Very High | Excellent | Moderate |
| Brushed + sealed | Grain texture | High | Good | Moderate |
| Polished | Reflective shine | Moderate | Moderate | Higher |
| wood-grain print | Decorative wood look | Moderate | Fair | Low–Moderate |
I recommend anodizing or powder coating for outdoor use. Brushing adds texture. Polishing adds style in indoor settings.
How does enclosure installation design matter?
I hear worries about fit and ease in assembly. Installation design is critical.
Installation design includes mounting layout, access panels, cable passages, ventilation paths, and service access.
I explain key aspects.
Mounting and fasteners
Plan screw bosses, stand-offs and brackets. Use threaded inserts or captive nuts. Align mounting points with internal components.
Access and service doors
Add removable panels or hinge doors for maintenance. Use sealing gaskets, finger handles, or quarter-turn fasteners.
Cable entry and management
Plan for cable glands, knock-outs or brush ports. Provide strain relief and space for routing wires.
Ventilation placement
Position vents high to let hot air escape. Position intake vents low. Keep dust filters if needed. Make vents out of profile or attached grills.
Sealing and ingress protection
Add foam gaskets at panel seams. Use rubber seals around doors. Design overlapping joints to keep out water or dust.
Assembly and production considerations
Think about ease of machining, part removal, and assembly steps. Avoid tight corners. Use common hole patterns. Design for scalable production.
I design enclosure layout as a user. I imagine opening panel to replace board. I test fit the PCB. I check access to screws. A good design makes installation simple and leads to fewer screws, lower cost and faster build.
Conclusion
A custom aluminum enclosure tailored by size, thermal design, surface treatment, and installation layout meets device needs. Good design ensures cooling, protection, ease of use, and aesthetics.

