
Aluminum Outside Corner Trim For Your Decoration?
I noticed rough and damaged external corners on my house. I felt worried about weather damage. I found aluminum outside corner trim helped protect and improve curb appeal. Now I share how and why it works.
I use aluminum outside corner trim on exterior edges. It prevents water damage, resists corrosion, and keeps corners sharp. The metal trim suits different profiles and weather conditions. Installation is simple if you follow steps carefully. You just pick trim type and finish for your facade style.
I will guide you through what makes outside corner trim ideal, profile choices, installation methods, and how weather affects longevity.
What makes aluminum outside corner trim ideal for exterior edges?
I saw exposed drywall or stucco corners suffer from rain, UV and impact. I installed aluminum outside corner trim and got strong, long-lasting protection.
Aluminum outside corner trim provides durable, weather-resistant coverage for exterior edges while improving visual appeal and simplifying maintenance.
You will learn why this trim stands up to the elements, provides long-term protection, and how it enhances exterior surfaces.
Aluminum is naturally corrosion-resistant. It holds up in rain, snow, salt air, and sun exposure. It stops paint and substrate damage at vulnerable corners. It also adds clean lines and structure to exterior walls.
I will explain deeper now.
Weather resistance and corrosion protection
Aluminum does not rust like steel. It forms a protective oxide layer that keeps moisture out. This feature makes it perfect for damp climates or coastal locations. It resists UV fade, and finishes stay stable under sun exposure. You can avoid rot or cracking seen in wood trims.
Impact and abrasion durability
Exterior corners often get bumped by lawn equipment, ladders, kids playing. Aluminum corner trim resists dents and abrasion. It keeps corners crisp even after minor impacts. The metal edge shields stucco or siding from chipping and wear.
Clean architectural lines
Beyond protection, aluminum corner trim sharpens the edge of walls. It defines transitions between materials (e.g., siding and stucco) neatly. It can enhance the look of modern facades, cottage-style cottages, or commercial builds. It can make corners crisp and professional.
Low-maintenance and longevity
Once installed, aluminum trim seldom needs repainting. A periodic rinse removes dust or dirt. It stays stable for years with minimal upkeep. This reduces maintenance cost and effort over time.
Long term cost-effectiveness
Higher initial cost than plastic or vinyl trim. But given its long service life and low maintenance, it often comes out more economical. You avoid frequent replacements or repainting. Plus installation is fast, saving labor.
I add a table for comparison:
| Feature | Aluminum Outside Trim | Wood or Vinyl Trim |
|---|---|---|
| Rust / corrosion resistance | Excellent | Poor to moderate |
| Weather and UV resilience | High | Moderate, fades or warps |
| Impact resistance | Strong | Lower, can crack or dent |
| Maintenance need | Very low | Medium to high |
| Visual finish over time | Stable | Can fade or peel |
How to choose between L-angle and bullnose outside corner trim?
I looked for trim profiles that match my home style. I learned L-angle gives sharp edges, bullnose gives smooth curves. I tested both on mock walls. Each suits different design goals and corner shapes.
Choosing between L-angle and bullnose trim depends on your design style, corner shape, and level of edge softness or boldness desired.
You will understand which trim profile fits minimalist, traditional, or curved corners. And you get to choose based on shape and aesthetic.
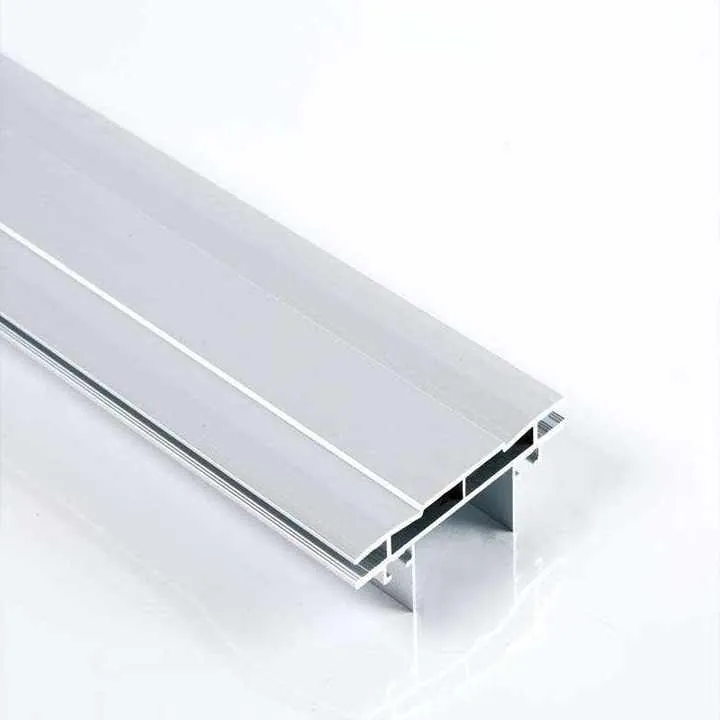
L-angle outside corner trim
This trim has a sharp 90° edge. It works for straight, angular corners. I chose L-angle for modern and minimalist facades. It emphasizes crisp lines and clean geometry. It suits square corners of stucco or siding well.
L-angle is easier to cut and install because it is flat on both sides. It gives strong mechanical support to corners. For houses with clear edges, L-angle fits perfectly.
Bullnose outside corner trim
This trim has a rounded edge instead of sharp angle. It gives a softer transition on corners. I used bullnose trim on a cottage-style home with curved eaves. The rounded shape adds warmth and a subtle finish.
Bullnose can hide imperfect corner alignment better. It suits materials that may expand or warp slightly. It also feels safer to touch around high-traffic areas.
When to choose which
| Trim Profile | Corner Shape | Best Curb Appeal Style | Notes |
|---|---|---|---|
| L-angle (square) | Sharp 90° outside corner | Modern, minimalist, contemporary | Strong visual line, easy to install |
| Bullnose (rounded) | Smooth or imperfect angle | Cottage, traditional, soft styles | Softer feel, hides small misalignments |
If your house has crisp, straight lines you likely want L-angle trim. If your design leans toward cozy, rounded edges or vintage flair, bullnose might blend better. Also, consider safety if corners may be walked past often—rounded edges feel less harsh.
What installation methods for outside corner trim on walls?
I installed trim on my exterior stucco and siding. I found methods for both adhesive and mechanical fastening. Careful prep made it look professional and weather-tight.
You can install outside corner trim using adhesive sealants and/or fasteners; preparation, alignment, sealants and finishing are key for weather-proof corners.
Follow these steps to secure aluminum trim outside so it stays strong under rain and wind.
1. Surface preparation
Inspect the corner substrate. Remove loose paint, dust, and old caulk. Repair cracks or holes. Make sure surface is dry. Tape off adjacent wall to protect finish. Clean with isopropyl alcohol so sealant bonds well.
Cut each trim piece to full height or trim as needed. Use metal snips or chop saw with fine blade. Cut cleanly and wear protective gloves and mask.
2. Placement and dry test
Dry fit pieces before applying adhesive. Align trim along corner and check for gaps. Use shims to hold spacing if walls are uneven. Trim should sit flush along both faces.
If corners are not exact 90°, choose bullnose or adjust L-angle with flexible flashing.
3. Adhesive and sealant application
Use exterior-grade construction adhesive or polyurethane sealant. Apply a continuous bead on inner faces and back of trim. Press trim into place firmly. Full contact yields best adhesion.
Optional: install foam backer rod first if large gaps exist, then apply sealant.
4. Mechanical fasteners
For added security, use stainless steel or galvanized screws or nails. Pre-drill holes in trim to avoid splitting. Position screws at regular intervals (e.g., every 300–400 mm). Countersink slightly and cover with color-matched sealant or caps.
5. Sealing joints and edges
Where two pieces meet, overlap by 10 mm or butt with tight joint. Apply sealant over seam. Seal top and bottom termination points to prevent water ingress. Smooth sealant bead flush with edge.
Allow sealant to cure as per manufacturer instructions (often 24–48 hours).
6. Final inspection and cleaning
After the sealant cures, test trim adhesion gently. Clean the trim surface with mild detergent. Remove any excess sealant or adhesive. Check corners after rain to ensure water is shedding properly.
Table: Installation Summary
| Step | What to Do |
|---|---|
| Surface prep | Clean, dry, repair, remove old materials |
| Dry fit | Align trim, adjust for fit, test spacing |
| Apply adhesive | Use exterior sealant or construction adhesive |
| Use fasteners | Pre-drilled stainless screws or nails if needed |
| Seal seams and edges | Overlap or butt joints, apply continuous sealant |
| Clean and inspect | Remove residue, test adhesion, check after weather |
I found doing careful prep before adhesive saved revision work later. Using both adhesive and screws gives maximum strength. Sealant choice matters—choose Uv-rated and paintable types. Test alignment by stepping back to check lines visually.
How does outdoor weather affect aluminum corner trim longevity?
I live in a region with rain, sun, and occasional snow. I tracked my installed aluminum trim over years. I saw how weather impacts longevity. I learned maintenance helps maximize life.
Outdoor weather affects aluminum trim minimally compared to other materials, but exposure to UV, salt air, thermal cycling, and freeze-thaw cycles can shorten lifespan unless proper finishes and installation methods are used.
You will learn factors that affect trim life and how to mitigate them with good finish choices and installation.
UV exposure and fading
Even aluminum finishes can fade over time in strong sunlight. powder-coated trim may lose vibrancy after years in full sun. Painted finishes may chalk or peel if not properly primed. Choose Uv-resistant finishes and high-quality coatings to minimize this.
Salt air and coastal corrosion
In coastal regions, salt mist can corrode metals more aggressively. While aluminum naturally resists corrosion, small scratches or unfinished edges may corrode faster. Anodized or marine-grade powder coated finishes offer better protection in salty environments.
Thermal expansion and contraction
Temperature swings cause aluminum to expand and contract. If trim is rigidly fastened with no allowance, joints can crack or pull away. Allow small gaps, use flexible sealants, and apply fasteners in elongated slots where design allows movement.
Freeze-thaw cycles
In climates with freezing rain or snow, water can get behind trim and freeze. This may cause trim to lift or sealant to crack. Proper sealing of top and bottom edges, and effective drainage behind the trim, helps prevent damage.
Mechanical wear from storms or debris
Strong winds or flying debris can scratch or dent trim over time. Finishes that chip easily may expose bare metal. Choosing thick gauge aluminum (e.g., 1.2 mm or 0.9 mm+) helps resist dents, and protective sealant at edges helps shield finish.
Table: Weather Impact vs Protection Strategy
| Weather Factor | Potential Issue | Protective Strategy |
|---|---|---|
| UV exposure | Fading or chalking | Uv-resistant powder or anodized finish |
| Salt or coastal air | Corrosion at scratches or seams | Marine-grade coating, sealed joints |
| Temperature expansion | Joints crack or pull away | Use flexible sealant, allow movement |
| Freeze-thaw cycles | Sealant failure, trim lifting | Top/bottom sealing, proper drainage |
| Wind/debris | Dents or scratches | Thicker aluminum gauge, protected edges |
I monitored my trim for 5 years. Anodized finishes held up best. Powder coated white in shade faded slowly. Bullnose edges helped shed water. Properly sealed joints showed no leaks even in freeze cycles.
Conclusion
I have shown what makes aluminum outside corner trim ideal for exterior edges, how to choose L-angle or bullnose profiles, installation methods, and how weather affects longevity. With correct profile, installation, and finish, exterior trim can last for decades.


